2 个不稳定版本
| 0.2.0 | 2022年1月8日 |
|---|---|
| 0.1.0 | 2021年12月22日 |
在 #interop 中排名第 84
每月下载量 150
在 2 crates 中使用
2KB
按需加载
使用 yew-interop,每个资源在消费组件请求它时才按需请求。
如果你使用 wasm-bindgen 的 JS-snippet 方法 包含你的库,或者直接在 index.html 中插入它们作为 <script/> 或 <link/>,即使没有消费组件,资源也会在每次请求时加载。这可能导致拥塞和浪费数据。
一次性加载,到处使用
每个资源只严格请求一次。如果一个资源在一个组件中已被请求,其他消费组件不会触发重新加载。对同一资源的其他请求将等待加载完成,或者如果资源已加载,则立即返回就绪状态。
演示
示例文件夹 包含了一个用 yew-interop 构建的演示网站
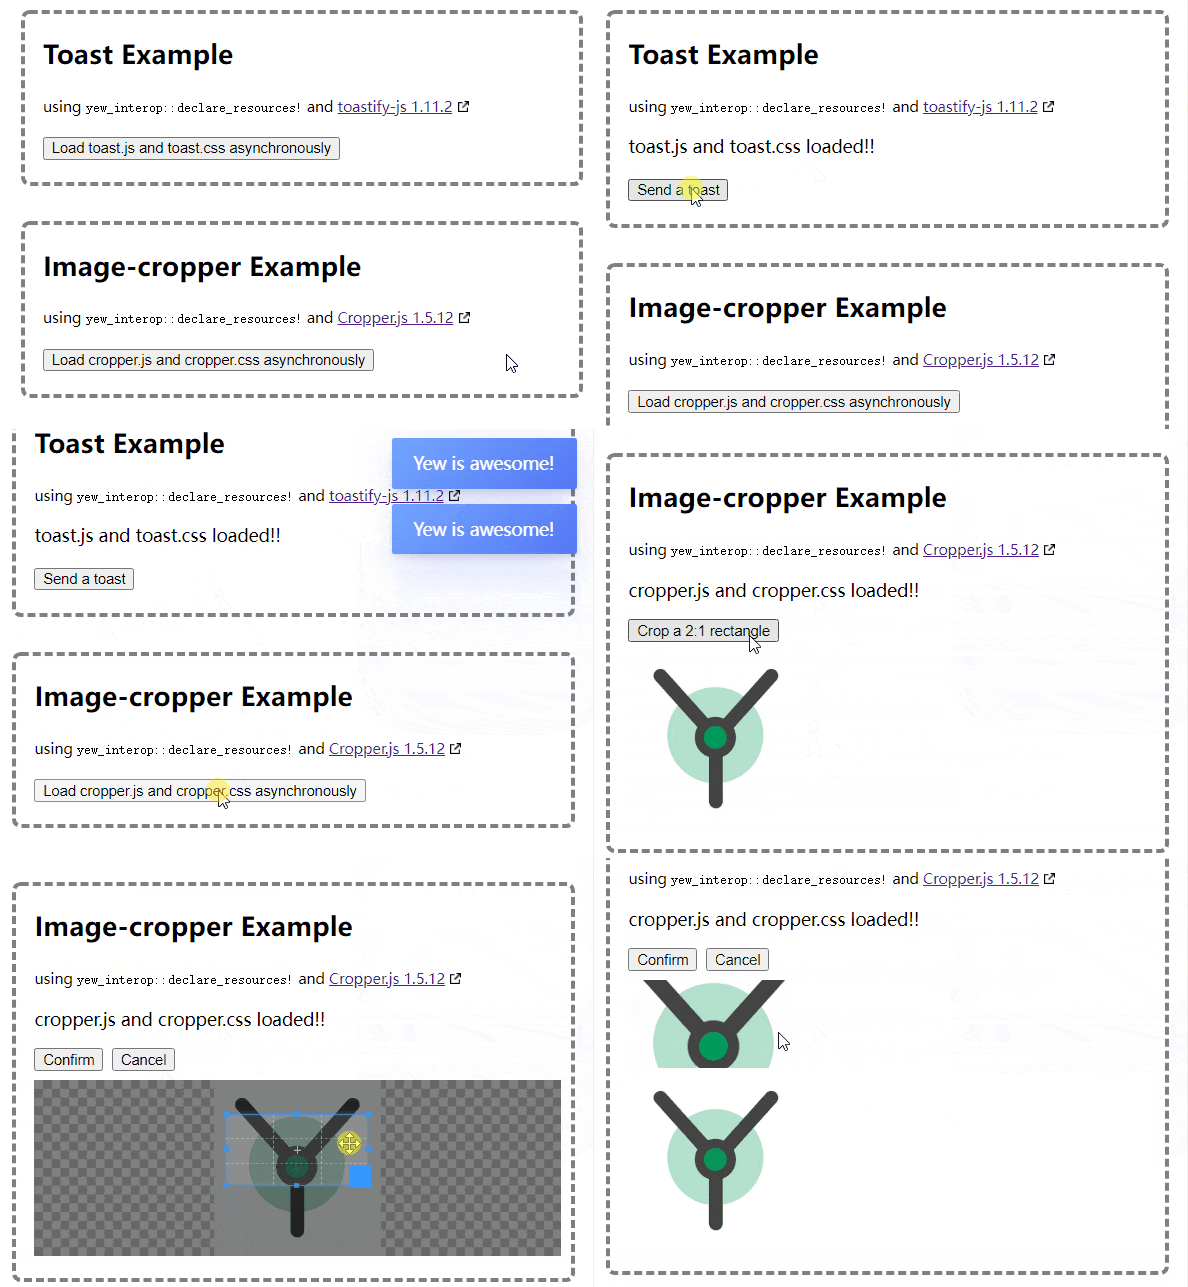
下面的 gif 展示了前两个用例,由于演示目的,加载速度被限制。

安装
主分支包含最新的开发代码。
yew-interop = {git="https://github.com/Madoshakalaka/yew-interop.git", branch="master", features=["yew-stable"]}
yew-stable 功能与 crates.io 上 yew 的最新版本兼容,目前为 0.19。如果你使用 yew-next(yew 的主分支),将 yew-stable 功能更改为 yew-next。
或者,你可以安装在 crates.io 上发布的最新版本,它使用 yew 0.19。
yew-interop = "0.3"
注意,yew-next/yew-stable 功能仅在主分支中存在,因为发布的 crate 不能有 git 依赖项。
API
异步加载 CSS 或 JavaScript 库
如果你的 JavaScript 库公开了你想要在 Rust 中使用的函数或对象,那么使用 yew_interop::declare_resources! 就是正确的选择。
首先,你想要创建一个独立的模块 interop 并在那里声明你的依赖。
// alternatively, create a separate file `interop.rs`,
// and add `mod interop;` to `main.rs` to have tidier code.
mod interop{
    use yew_interop::declare_resources;

    declare_resources!(
        library_a
        "https://my-cdn.com/library-a.min.js"
        library_b
        "https://my-cdn.com/library-b.min.js"
        "https://my-cdn.com/library-b.min.css"
        library_c
        "/static/library-c.min.js"
        "/static/library-c.min.css"
    );
}
此宏展开为一个 <ResourceProvider/> 组件。你想要将应用根包裹在这个提供者中
use yew::prelude::*;
use interop::ResourceProvider;

#[function_component(App)]
pub fn app() -> Html {
    html! {
        <ResourceProvider>
            // the rest of your app
        </ResourceProvider>
    }
}
此宏还将通过在资源名称前添加 "use_" 来扩展为钩子,在这种情况下,宏将展开为 pub fn use_library_a() -> bool 和 pub fn use_library_b() -> bool
在你的消费组件中,你可以使用这些钩子来异步等待库加载
use yew::prelude::*;
use interop::use_library_a;

#[function_component(Consumer)]
pub fn consumer() -> Html {
    let library_a_ready = use_library_a(); // <-- generated hook

    html! {
        if library_a_ready{
            // use library a here
        }else{
            <p>{"please wait..."}</p>
        }
    }
}
对于 JavaScript 库,在 Rust 中使用该库之前,您还需要使用
wasm-bindgen和js-sys编写一些存根。wasm-bindgen 书籍有一个关于此的 很好的章节。您还可以查看我们的演示网站并查看如何实现 这里
显式资源类型
declare_resources! 宏需要知道一个 URL 是 JavaScript 还是 CSS。当你提供类似于上面的字符串字面量时,宏会从最后一个路径段的后缀中推导出信息。它期望 .js 或 .css,并且足够智能,可以排除查询参数或片段。
当路径段不以 .js 或 .css 结尾,或者当你提供其他表达式(如宏调用或标识符)时,你需要手动指定 URL 类型,在 URL 前添加自定义关键词 js/css。
declare_resources! 会接受任何返回类型实现 Into<Cow<'static, str>> 的表达式,因此 &'static str、String、Cow<'static, str> 都是可行的。
这里有一个更复杂的例子
use yew_interop::declare_resources;

const MY_LIB_JS: &str = "https://cdn.com/my_lib.js";

declare_resources!(
        my_lib
        js MY_LIB_JS
        "https://cdn.com/my_lic_b.css" // <-- when a string literal is provided, script type is determined from the suffix
        "/static/snippet.js"
        js concat!("https://a.com/", "b.js")
        my_lib_b
        css "/somehow/ends/with/.js" // <-- explicit type css overrides the suffix
        my_lib_c
        js String::from("https://a.com/test.js")
    );
副作用 JavaScript
在这里,副作用脚本指的是在页面加载时运行的 JavaScript,而不是公开函数和类的库。
如果你的 JavaScript 是副作用脚本,你想要启用 script 功能。
# change yew-stable to yew-next if you use yew's master branch
yew-interop = {git="https://github.com/Madoshakalaka/yew-interop.git",  features=["yew-stable", "script"]}
或者
yew-interop = {version = "0.3", features = ["script"]}
你需要将脚本标识符前面加上一个感叹号 (!)。并且每个标识符只能有一个脚本 URL,以下是一个示例
use yew_interop::declare_resources;

declare_resources!(
   lib // <- normal library
   "https://cdn.com/lib.js"
   "/static/lib.css"
   ! my_script // <- exclamation mark for side effect scripts
   "https://cdn.com/script.js"
);
由于只允许 JavaScript,你无需显式指定资源类型。
与前面的示例相同,这将扩展为 use_<identifier> 钩子。不同之处在于,钩子返回的是一个 Option<Script>,当脚本正在加载时,它返回 None。
要运行脚本,您需要渲染一个 <ScriptEffect/> 组件,并将脚本对象传递给该组件。这样,您可以自由控制脚本何时以及是否运行。该 <ScriptEffect/> 组件是文档的 <head/> 元素的 入口,因此它不会在其位置渲染任何内容,它只会渲染时运行脚本。
mod interop{
   use yew_interop::declare_resources;
   declare_resources!(
       ! my_script
       "https://cdn.com/script.js"
   );
}

use yew::prelude::*;
use yew_interop::ScriptEffect;
use interop::use_my_script; // <-- generated hook

/// this example simply runs the script on every re-render, if the script is ready.
#[function_component(MyComp)]
pub fn my_comp() -> Html {
    let script = use_my_script(); // <-- returns Option<Script>

    // ...snip

    html! {
        if let Some(script) = script{
           <ScriptEffect {script}/>
        }else{
           <p>{"Please wait..."}</p>
        }
    }
}
如果您的脚本依赖于其他组件的渲染,例如演示中的第四个示例 中 的脚本,其中脚本为渲染的元素添加了点击处理器,您需要确保脚本在所有依赖项渲染后渲染。
Yew 从底部到顶部以广度优先的顺序渲染子节点,这并不是最直观的渲染顺序。
保证正确渲染顺序的一种方法是将 <ScriptEffect/> 组件作为 最深依赖项的上层兄弟 放置。
例如,假设您的脚本依赖于两个组件 <ComponentA/> 和 <ComponentB/>。
下面的情况显示了正确放置,其中 A 和 B 拥有相同的深度,
   html!{
       <>
       <ScriptEffect {script}/>
       <ComponentA/>
       <ComponentB/>
       // <ScriptEffect {script}/> !!! do not place here, otherwise it would render first
       </>
   }
这里的渲染顺序是 B -> A -> ScriptEffect。
这是更复杂的一个,其中 B 深度更深,所以我们把我们的组件放在 B 的上面
#[derive(Properties, PartialEq)]
pub struct ContainerProps {
   children: Children
}

#[function_component(Container)]
pub fn container(props: &ContainerProps) -> Html {
   // --snip--
   html! {
       {for props.children.iter()}
   }
}

html!{
    <>
    <ComponentA/>
    <Container>
        <ScriptEffect {script}/>
        <ComponentB/>
    </Container>
    <ComponentC/>
    </>
}
渲染顺序是 C -> Container -> A -> B -> ScriptEffect。
贡献
您的 pull request 欢迎加入!CI 中有广泛的测试。请务必查看我们的 开发指南。