19次发布
| 0.8.0 | 2023年10月30日 |
|---|---|
| 0.7.0 | 2023年1月20日 |
| 0.6.0 | 2022年6月20日 |
| 0.5.4 | 2022年1月27日 |
| 0.3.3 | 2020年3月27日 |
#63 在 游戏开发
每月114次下载
17MB
13K SLoC
包含(Windows DLL,2.5MB)lib/msvc/dll/64/SDL2.dll,(Windows DLL,2MB)lib/msvc/dll/32/SDL2.dll,(Windows DLL,1.5MB)lib/msvc/dll/32/SDL2_ttf.dll,(Windows DLL,1.5MB)lib/msvc/dll/64/SDL2_ttf.dll,(静态库,1MB)lib/msvc/lib/32/SDL2test.lib,(静态库,1MB)lib/msvc/lib/64/SDL2test.lib 等以及其他44个文件。
引擎
📖 概述 - 🌆 截图 - 🚀 入门 - 🛠️ 特性 - ⚠️ 已知问题 - 💬 联系
概述
pix_engine 是一个跨平台的图形 & UI 库,用于简单游戏、可视化、数字艺术和图形应用程序,由 Rust 编写,支持 SDL2(以及即将到来的 Web-Assembly!)渲染器。
这个库的主要目标是简单设置和使用,用于图形或算法探索,并不旨在像其他大型图形库那样功能全面。
然而,它不仅仅是一个玩具库,还可以用于驱动实际的应用程序。例如,Tetanes NES 模拟器使用 pix_engine 进行渲染、窗口和事件处理。
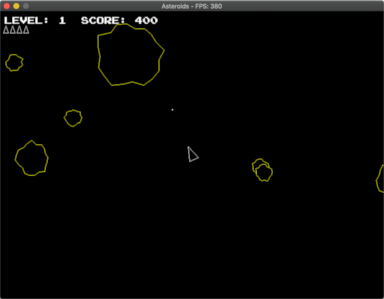
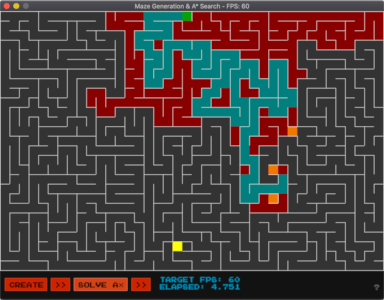
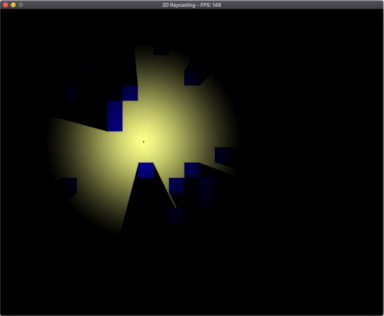
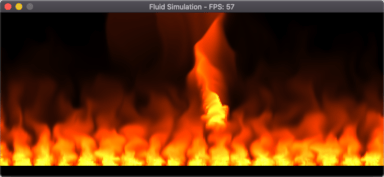
您可以使用 pix-engine 创建的一些示例
- 场景或物体的2D光线投射。
- 包括音效、音乐和UI元素的Asteroids、Tetris、Pong或平台游戏。
- 简单的3D场景或游戏。
- 音频播放和录制应用程序。
- 基本应用程序或配置的用户界面。
- 排序、搜索或粒子模拟的算法可视化。
- 图像查看和编辑。
- 视觉艺术。
最低支持的Rust版本 (MSRV)
当前最低的Rust版本是 1.67.0。
屏幕截图


入门指南
安装依赖项
首先,您需要安装 Rust!请按照https://rust-lang.net.cn/learn/get-started上的最新说明进行操作。
当为桌面目标(如 macOS、Linux 或 Windows)构建或运行应用程序,而不是 Web-Assembly 目标时,您必须安装 SDL2 库。注意:Windows系统可能需要安装 Visual Studio C++ Build Tools。
安装 SDL2 有几种选项,但以下是最常见的:
- 对于
macOS,可以通过 homebrew 安装,对于Linux,可以使用包管理工具如apt,对于MSVC,可以在Windows上安装。
有关更多详细信息以及安装选项,请参阅 rust-sdl2 文档。
macOS、Linux 或 Windows 10 Subsystem for Linux (homebrew)
brew install sdl2 sdl2_gfx sdl2_image sdl2_mixer sdl2_ttf
Linux (包管理器)
注意:最低的 SDL2 版本是 2.0.20。一些包管理器可能没有提供最新版本。
Ubuntu:
sudo apt-get install libsdl2-dev libsdl2-gfx-dev libsdl2-image-dev
libsdl2-mixer-dev libsdl2-ttf-dev
Fedora:
sudo dnf install SDL2-devel SDL2_gfx-devel SDL2_image-devel SDL2_mixer-devel SDL2_ttf-devel
Arch:
sudo pacman -S sdl2 sdl2_gfx sdl2_image sdl2_mixer sdl2_ttf
Windows (MSVC)
- 从 https://www.libsdl.org/download-2.0.php 下载最新的
SDL2MSVC开发库,例如(SDL2-devel-2.0.20-VC.zip)。 - 从https://www.libsdl.org/projects/下载最新的
SDL2_image、SDL2_mixer和SDL2_ttfMSVC开发库。例如(SDL2_image-devel-2.0.5-VC.zip)。 - 将每个
.zip文件解压到一个文件夹中。 - 复制库文件
- 从:
lib\x64\
- 到:
C:\Users\{Username}\.rustup\toolchains\{current toolchain}\lib\rustlib\{current toolchain}\lib,其中{current toolchain}可能是stable-x86_64-pc-windows-msvc。- 注意:如果您不使用
rustup,请参阅rust-sdl2获取Windows安装的更多信息。
- 注意:如果您不使用
- 从:
- 将所有
dll文件- 从:
lib\x64\ - 复制到:您的
cargo项目旁边的Cargo.toml。
- 从:
SDL2的MSVC二进制文件也存放在此存储库的lib文件夹中。
创建您的应用程序
使用pix-engine创建视觉或交互式应用程序只需要为您的应用程序实现PixEngine trait的单个方法:PixEngine::on_update,该方法尽可能频繁地执行。在该函数中,您将访问一个可变的PixState对象,它提供了一些用于修改设置和在屏幕上绘制的功能。
PixEngine提供了一些其他方法,可以实现以响应用户事件和处理应用程序的启动和关闭。
以下是一个示例应用程序,该应用程序简单地绘制一个跟随鼠标的圆圈,根据鼠标是否按下,渲染为白色或黑色。
use pix_engine::prelude::*;

struct MyApp;

impl PixEngine for MyApp {
    // Set up application state and initial settings. `PixState` contains
    // engine specific state and utility methods for actions like getting mouse
    // coordinates, drawing shapes, etc. (Optional)
    fn on_start(&mut self, s: &mut PixState) -> PixResult<()> {
        // Set the background to GRAY and clear the screen.
        s.background(Color::GRAY);

        // Change the font family to NOTO and size to 16 instead of using the
        // defaults.
        s.font_family(Font::NOTO)?;
        s.font_size(16);

        // Returning `Err` instead of `Ok` would indicate initialization failed,
        // and that the application should terminate immediately.
        Ok(())
    }

    // Main update/render loop. Called as often as possible unless
    // `target_frame_rate` was set with a value. (Required)
    fn on_update(&mut self, s: &mut PixState) -> PixResult<()> {
        // Set fill color to black if mouse is pressed, otherwise wite.
        if s.mouse_pressed() {
            s.fill(color!(0));
        } else {
            s.fill(color!(255));
        }

        // Draw a circle with fill color at the mouse position with a radius of
        // 80.
        let m = s.mouse_pos();
        s.circle([m.x(), m.y(), 80])?;

        Ok(())
    }

    // Clean up any state or resources before exiting such as deleting temporary
    // files or saving game state. (Optional)
    fn on_stop(&mut self, s: &mut PixState) -> PixResult<()> {
        Ok(())
    }
}

fn main() -> PixResult<()> {
    let mut engine = Engine::builder()
      .dimensions(800, 600)
      .title("MyApp")
      .show_frame_rate()
      .resizable()
      .build()?;
    let mut app = MyApp;
    engine.run(&mut app)
}
特性
Crate功能标志
根据您的需求,以下功能可以添加到您的Cargo.toml中。例如。
[dependencies.pix-engine]
version = "0.6.0"
default-features = false
features = ["serde"]
-
serde - 为所有枚举/结构体添加serde
Serialize/Deserialize实现。 -
backtrace - 为anyhow启用
backtrace功能,允许根据在std::backtrace中概述的环境变量打印回溯。这在调试中很有用。 -
opengl - 强制
sdl2使用opengl作为其渲染器。默认情况下禁用此功能,允许sdl2在目标系统上使用默认的渲染器。例如,macOS默认使用metal。
PixState
PixState是整个pix-engine生命周期的全局应用程序上下文,从设置到关闭。它包含所有必要的设置和方法,用于将像素绘制到屏幕上、管理窗口、纹理、渲染设置等。请参阅创建您的应用程序,了解引擎生命周期方法和PixState的用法示例。
绘图
所有用于绘制形状、文本或UI小部件的绘图原语都可在PixState实例中找到。某些方法仅在相应的特性行为域中才可用。许多特性行为默认包含在prelude中。
一些示例
// Draw a circle at `(x, y)` coordinates`(0, 0)` with a radius of `80`.
s.circle([0, 0, 80])?;

// Draw a rectangle at `(x, y)` coordinates `(10, 20)` with a width `80` and a
// height of `100`.
s.rect([10, 20, 80, 100])?;
还有一些便利宏可以创建用于绘制的形状,或者存储在struct
// Create a triangle with points at `(x, y)` coordinates `(10, 20)`, `(30, 10)`,
// `(20, 25)`.
let t = tri!([10, 20], [30, 10], [20, 25]);

// Create a 3D point at `(x, y, z)` coordinates `(10, 20, 10)`.
let p = point!(10, 20, 10);

// Create a square at point `p` with a width/height of `100`.
let r = square!(p, 100);
纹理
纹理简单来说就是像素的表示,但有一些额外的灵活性。
- 它们可以独立于正在渲染的主要画布进行绘制。
- 它们可以被转换、裁剪或修改。
- 它们可以混合在一起,并相互叠加。
默认情况下,所有绘图操作都针对主窗口画布。一旦绘制,像素就是静态的,只能重新绘制。使用纹理可以创建如可拖拽元素、弹出窗口、动画精灵等。
要创建纹理
// Create a texture with a width and height of 256, formatting as RGB with no
// alpha channel. You can also provide `None` as the format which will inherit
// the format of the current window.
let texture_id = s.create_texture(256, 256, PixelFormat::Rgb);

// Draw to the texture. These changes are not visible in the window.
s.set_texture_target(texture_id)?;
s.background(Color::BLACK);
s.text("Hello World!");
s.clear_texture_target();

// Now draw the texture to the current canvas. Specifying `None` as the `src`
// argument means use the entire texture size. The `dst` here is double the
// original texture which has the effect of scaling the texture by 2.
s.texture(texture_id, None, rect!(0, 0, 512, 512))?;

// To clean up unused textures, simply delete them.
s.delete_texture(texture_id)?;
音频
目前提供了有限形式的音频支持,更广泛的支持即将推出。默认情况下,有一个音频队列可供推送样本。
s.resume_audio(); // Audio queue starts in a `Paused` state.

// Some method generating `f32` samples between 0.0 and 1.0
let samples = generate_audio();
s.enqueue_audio(&samples);
还有一个AudioCallback特性行为,您可以实现它来进行基于回调的音频生成。有关详细信息,请参阅examples/文件夹。使用此回调,您还可以使用麦克风进行有限的音频录制和播放。
UI
概述
pix-engine提供了一种即时模式图形用户界面库(IMGUI),它允许快速进行性能良好且设置/迭代简单的UI开发。一些限制
- 样式仅限于简单的颜色主题和间距。
- 没有动画或图形效果。
- 布局结构有限 - 更复杂的布局需要精心编写的代码。
- 对视口更改的响应有限。
API设计的大部分灵感来自Dear ImGui,但请注意以下差异
- 没有窗口渲染实用工具或功能。相反,可以打开独立的本地窗口,并在其中渲染UI元素。这种方法通过利用本地窗口的功能(如最小化、最大化、调整大小等)简化了窗口管理。
最终用户指南
Tab/Shift-Tab在可交互元素之间循环焦点。Enter/Return在活动元素上模拟点击。- 在滑块或拖动框上按
Ctrl+Click(在macOS上按Cmd+Click)可编辑值为文本。- 按
Tab/Escape/Return退出编辑模式。
- 按
- 鼠标滚轮可以滚动出视口的元素。
- 文本字段
Ctrl+Backspace(在macOS上按Cmd+Backspace)可删除所有内容。Alt+Backspace(在macOS上按Option+Backspace)可删除单个单词。Ctrl+X(在macOS上按Cmd+X)可将内容剪切到系统剪贴板。Ctrl+C(在macOS上按Cmd+C)可将内容复制到系统剪贴板。Ctrl+V(Cmd+V在 macOS 上) 从系统剪贴板粘贴内容。
程序员笔记
- 查看
gui文件夹中的示例以开始。 - UI 通过代码生成,UI 方法调用在
PixState实例的PixState::on_update渲染循环中执行,该循环每帧被调用一次。 - 元素从左上角按顺序渲染到底部右角。
- 除非明确更改,否则每个元素都会将自己定位在上一元素下方。调用
PixState::same_line将位置移动到上一元素的右侧。
窗口
随着您的应用程序增长,您可能需要同时打开不同的视图。这可以通过打开额外的窗口来进行渲染。每个窗口都有自己的画布,同时共享全局 PixState 上下文设置。API 与处理纹理非常相似。
// Create a window with size of 800x600.
let window_id = s
  .window()
  .dimensions(800, 600)
  .title("My Window")
  .position_centered()
  .build()?;

// Draw to the window. These changes are immediately visible in the window.
s.set_window_target(window_id)?;
s.background(Color::BLACK);
s.fill(Color::RED);
s.text("Hello World!");
s.reset_window_target();

// A user can either close the window with the `X` button, `Ctrl-W`, `Alt-F4`,
// etc. or you can close it programatically.
s.close_window(window_id)?;
注意:在创建和管理窗口时需要考虑的一点是,当一个窗口被关闭时,其 ID 变为无效。尝试在无效窗口中绘制将返回错误。因此,大多数窗口创建也将需要从应用程序中删除无效窗口 ID。
fn on_window_event(
    &mut self,
    _s: &mut PixState,
    window_id: WindowId,
    event: WindowEvent,
) -> PixResult<()> {
    if event == WindowEvent::Close && self.popup_window == Some(window_id) {
      self.popup_window = None;
    }
    Ok(())
}
日志记录
此库使用 log crate。要在您的应用程序中利用日志记录,请选择支持的日志记录实现之一,并在您的 main 函数中初始化它。
使用 env_logger 的示例
fn main() -> PixResult<()> {
    env_logger::init();

    let mut engine = Engine::builder()
      .dimensions(800, 600)
      .title("MyApp")
      .build()?;
    let mut app = MyApp;
    engine.run(&mut app)
}
已知问题
请参阅 github 问题跟踪器。
许可证
根据您的选择,许可为以下之一
- Apache License,版本 2.0 (LICENSE-APACHE)
- MIT 许可证 (LICENSE-MIT)
。
贡献
除非您明确声明,否则您有意提交以包含在您的工作中的任何贡献,根据 Apache-2.0 许可定义,应按上述方式双重许可,而不附加任何其他条款或条件。
联系
有关问题报告,请使用 github 问题跟踪器。您也可以直接联系我,地址为 https://lukeworks.tech/contact/。
致谢
这已经是一个真正的热情项目几年了,我无法感谢开源社区为所有惊人的内容和支持。
特别感谢以下项目,它们对实现和演变此crate产生了重大影响
依赖关系
~4–8MB
~153K SLoC