6 个版本 (稳定版)
| 1.1.1 | 2023 年 8 月 11 日 |
|---|---|
| 1.1.0 | 2023 年 7 月 26 日 |
| 0.1.1 | 2022 年 10 月 5 日 |
在 GUI 中排名 188
每月下载量 38
88KB
2K SLoC
tui-markup-renderer
Rust 库,用于使用 TUI 和标记来构建 UI 终端界面。
tl;dr;
您可以使用此工具生成新项目
# Install the package
cargo install tui-markup-renderer

# this will show you some help messages
tui-markup-gen -h

# To create a simple project called dummy_project use the next line:
tui-markup-gen -n dummy_name -t simple

# To create a shell project called complex_project use the next line:
tui-markup-gen -n complex_name -t shell
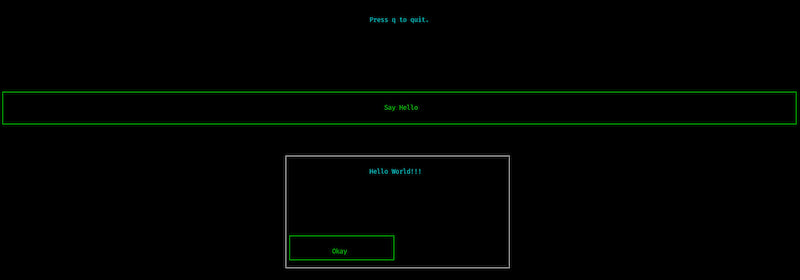
Xml 代码
<layout id="root" direction="vertical">
  <block constraint="10"> <!-- Don't forget the size, 1 by default -->
    <p align="center">
        Press q to quit.
    </p>
  </block>
  <block id="bts_block" constraint="6">
    <button id="btn_hello" action="open_dialog" index="1"> Say Hello </button>
  </block>
  <dialog id="dlg" show="show_dialog" buttons="Okay" action="on_dialog_event">
    <block id="dlg_block" border="all">
      <p align="center">
        Hello World!!!
      </p>
    </block>
  </dialog>
</layout>
Rust 代码
use crossterm::event::KeyCode::{self, Char};
use std::{collections::HashMap, io};
use tui::backend::CrosstermBackend;
use tui_markup_renderer::{event_response::EventResponse, markup_parser::MarkupParser};

fn main() -> Result<(), Box<dyn std::error::Error>> {
    // get access to StdOut
    let stdout = io::stdout();
    // Get the backend for TUI
    let backend = CrosstermBackend::new(stdout);
    // prepare the internal state for the app info
    let state = Some(HashMap::new());

    // prepare the markup parser
    let mut mp = MarkupParser::new("./assets/layout.tml".to_string(), None, state);

    // Dialogs generate button identifiers following the convention "on_<dialog id>_btn_<button name>"
    mp.add_action("open_dialog", |state| {
        let mut state = state.clone();
        state.insert("show_dialog".to_string(), "true".to_string());
        EventResponse::STATE(state)
    })
    .add_action("on_dlg_btn_Okay", |state| {
        let mut state = state.clone();
        state.insert("show_dialog".to_string(), "false".to_string());
        EventResponse::STATE(state)
    })
    .ui_loop(backend, |key_event, mut state| {
        let mut pressed = "none";
        match key_event.code {
            KeyCode::Esc => {
                pressed = "close_dialog";
            }
            Char('q') => {
                pressed = "close";
            }
            _ => {}
        }

        match pressed {
            "close_dialog" => {
                state.insert("show_dialog".to_string(), "false".to_string());
                EventResponse::STATE(state)
            }
            "close" => {
                state.insert("show_dialog".to_string(), "false".to_string());
                EventResponse::QUIT
            }
            _ => EventResponse::NOOP,
        }
    })
}
说明
工作原理
对于开发者来说,创建描述用户界面的已知数据结构更容易。
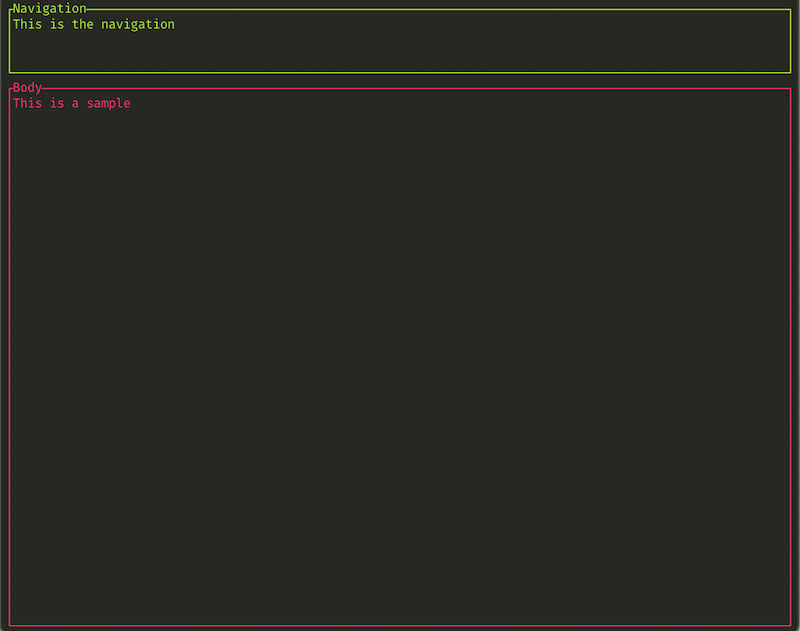
示例标记代码
<layout id="root" direction="vertical">
  <container id="nav_container" constraint="5">
    <p id="toolbar" title="Navigation" border="all" styles="fg:green">
      This is the navigation
    </p>
  </container>
  <container id="body_container" constraint="10min">
    <p id="body" title="Body" border="all" styles="fg:red">
      This is a sample
    </p>
  </container>
</layout>
生成
更复杂的示例
<layout id="root" direction="vertical">
  <container id="nav_container" constraint="5">
    <p id="toolbar" title="Actions" border="all" styles="fg:green">
      This is a sample
    </p>
  </container>
  <container id="body_container" constraint="10min">
    <block id="body_block" border="none">

      <layout id="content_info" direction="horizontal">
        <container id="ats_container" constraint="20%">
          <block id="ats_block" title="Ats" border="all">

          </block>
        </container>
        <container id="cnt_container" constraint="20min">
          <block id="cnt_block" title="Cnt" border="all">

          </block>
        </container>
      </layout>

    </block>
  </container>
  <container id="nav_container" constraint="5">
    <p id="footer" border="all" styles="bg:red;fg:black">
      This is a sample
    </p>
  </container>
</layout>
生成

计划功能
- 添加文档以使用它。
- 运行时模板更改。
规则!
- 布局允许开发者定义方向流。
- 块是一个可以具有边框、标题和用于定义元素大小的约束的面板。
- 边框
- 标题
- 常量以定义元素的大小。
- 块可以是布局的父元素。
- 容器是块的别名。
- 布局应该包含块/容器作为子元素,以设置用户界面。然而,根布局可以包含一些元素(如对话框)。
- 每个元素都可以有一个标识符(id),但标识符必须是唯一的。
- 您可以使用 styles 标签或元素的 styles 属性创建全局样式。
- 样式包括(目前)
- bg(背景颜色)。
- fg(前景颜色)。
- weight(字体粗细)。
- 您可以有一个 UI 状态来存储 UI 信息。
示例
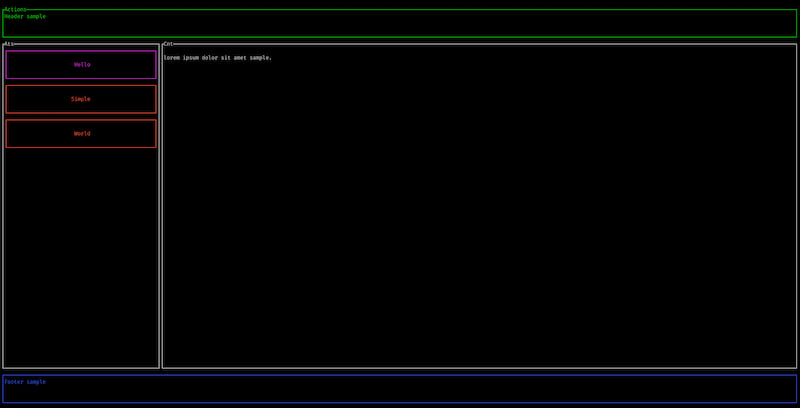
布局代码
有更好的吗?
<layout id="root" direction="vertical">
  <styles>

    button {
      fg: red;
      bg: black;
    }

    button:focus {
      fg: white;
      bg: red;
    }
    #footer {
      bg:black;
      fg:blue;
    }
  </styles>
  <container id="nav_container" constraint="5">
    <p id="toolbar" title="Actions" border="all" styles="fg:green">
      Header sample
    </p>
  </container>
  <container id="body_container" constraint="10min">
    <block id="body_block" border="none">

      <layout id="content_info" direction="horizontal">
        <container id="ats_container" constraint="20%" title="Ats" border="all">

          <layout id="vert_info" direction="vertical">
            <block id="ats_block" constraint="5">
              <button id="btn_hello" action="do_something" index="1" styles="fg:magenta" focus_styles="fg:white;bg:magenta"> Hello </button>
            </block>
            <block id="bts_block" constraint="5">
              <button id="btn_hello_2" action="do_something_else" index="3"> Simple </button>
            </block>
            <block id="bts_block" constraint="5">
              <button id="btn_hello_3" action="do_something_else" index="2"> World </button>
            </block>
          </layout>

        </container>
        <container id="cnt_container" constraint="20min">
          <block id="cnt_block" title="Cnt" border="all">
            <p>
              lorem ipsum dolor sit amet sample.
            </p>
          </block>
        </container>
      </layout>

    </block>
  </container>
  <container id="nav_container" constraint="5">
    <p id="footer" border="all">
      Footer sample
    </p>
  </container>
  <dialog id="dlg1" show="showQuitDialog" buttons="Yes|Cancel" action="on_dialog_event">
    <layout direction="vertical">
      <container constraint="3">
        <p align="center" styles="weight:bold">
          Close Application
        </p>
      </container>
      <container>
        <p align="center">
          Do you want to close the application?
        </p>
      </container>
    </layout>
  </dialog>
</layout>
Rust 代码
use clap::Parser;
use crossterm::event::KeyCode::{Char, self};
use std::{collections::HashMap, io};
use tui::backend::CrosstermBackend;
use tui_markup_renderer::{
    markup_parser::MarkupParser,
    event_response::EventResponse,
};

#[derive(Parser, Debug)]
#[command(author, version, about, long_about = None)]
struct Args {
    #[arg(short, long, default_value_t = String::from("run"))]
    execution_type: String,
    #[arg(short, long, default_value_t = String::from("./assets/layout1.tml"))]
    layout: String,
    #[arg(short, long, default_value_t = false)]
    print_args: bool,
}

fn main() -> Result<(), Box<dyn std::error::Error>> {
    let Args {
        layout,
        execution_type,
        print_args,
    } = Args::parse();

    let stdout = io::stdout();
    let backend = CrosstermBackend::new(stdout);
    let state = Some(HashMap::new());

    let mut mp = MarkupParser::new(layout.clone(), None, state);
    mp.add_action(
        "do_something",
        |_state: &mut HashMap<String, String>| {
            println!("hello!!!");
            EventResponse::NOOP
        },
    )
    .add_action(
        "do_something_else",
        |_state: &mut HashMap<String, String>| {
            println!("world!!!");
            EventResponse::NOOP
        },
    )
    .add_action(
        "on_dlg1_btn_Yes",
        |_state: &mut HashMap<String, String>| {
            EventResponse::QUIT
        },
    )
    .add_action(
        "on_dlg1_btn_Cancel",
        |state: &mut HashMap<String, String>| {
            let key = "showQuitDialog".to_string();
            state.insert(key, "false".to_string());
            EventResponse::STATE(state.clone())
        },
    )
    ;

    if print_args {
        println!(
            "[layout: {}, execution_type: {}, print_args: {}]",
            layout, execution_type, print_args
        );
    }

    if execution_type == String::from("run") {
        // async move
        mp.ui_loop(backend, |key_event, state| {
            let mut new_state = state.clone();
            let key = "showQuitDialog".to_string();
            // let back_value = String::new();
            let mut pressed = '\n';
            match key_event.code {
                KeyCode::Esc => {
                    pressed = '\r';
                }
                Char(character) => {
                    pressed = character;
                }
                _ => {}
            }

            if pressed == '\r' {
                let new_value = "false";
                new_state.insert(
                    key,
                    new_value.to_string(),
                );
                return EventResponse::STATE(new_state);
            }

            if pressed == 'q' {
                let new_value = "true";
                new_state.insert(
                    key,
                    new_value.to_string(),
                );
                return EventResponse::STATE(new_state);
            }

            return EventResponse::NOOP;
        })
    } else {
        env_logger::init();
        mp.test_check(backend)
    }
}
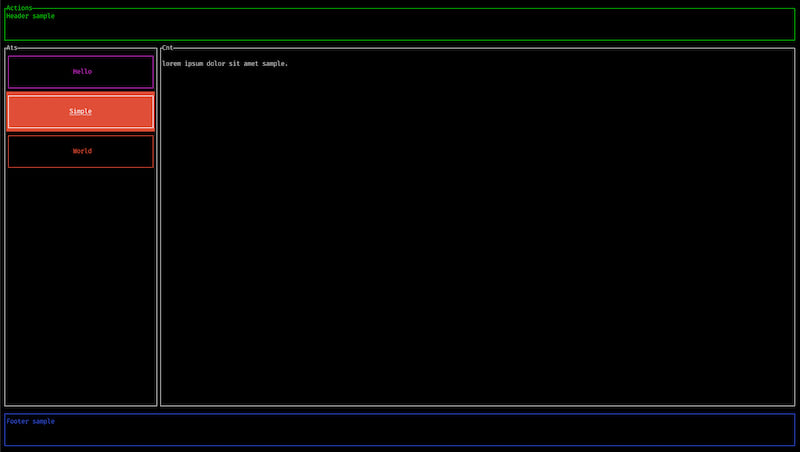
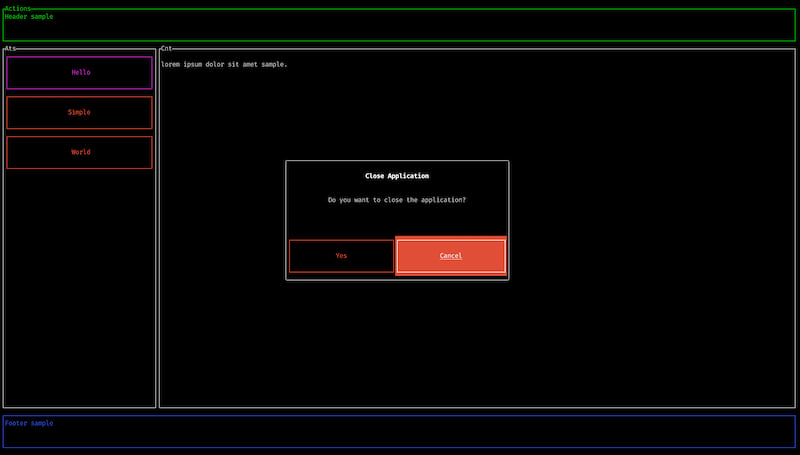
将生成以下内容
依赖关系
~7–20MB
~218K SLoC