35个版本
| 0.3.6 | 2024年5月20日 |
|---|---|
| 0.3.5 | 2023年6月16日 |
| 0.3.4 | 2022年9月8日 |
| 0.3.2 |
|
| 0.2.2 | 2019年6月25日 |
#6 在 可视化
2,415,976 每月下载量
在 5,200 个crate(218 个直接使用) 中使用
655KB
14K SLoC
Plotters - 一个专注于WASM和本地应用数据绘图的Rust绘图库 🦀📈🚀
Plotters是一个专为纯Rust渲染图形、图表和图表而设计的绘图库。Plotters支持多种后端类型,包括位图、矢量图、piston窗口、GTK/Cairo和WebAssembly。
- 新的Plotters开发者指南正在制作中。预览版本可在此处找到。
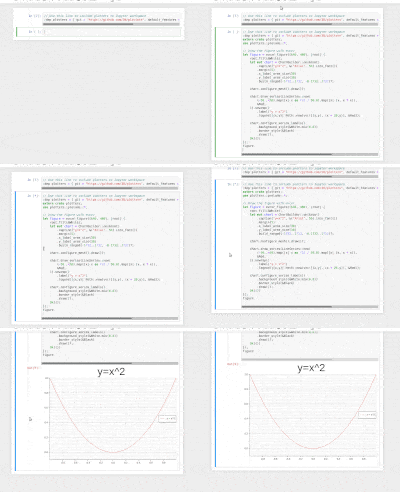
- 尝试使用交互式Jupyter笔记本使用Plotters,或在此处查看静态HTML版本。
- 要查看WASM示例,请访问此链接
- 目前,我们已准备好所有内部代码以进行控制台绘图,但基于控制台的后端仍未准备就绪。有关如何使用自定义后端在控制台上进行绘图的示例,请参阅此示例。
- Plotters已将一些后端代码移至单独的仓库,有关详细信息,请参阅常见问题解答列表。
- 有一些有趣的演示项目可供尝试。
画廊
要查看每个示例的源代码,请单击示例图片。

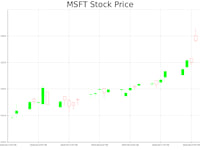


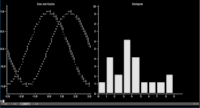
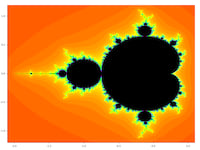

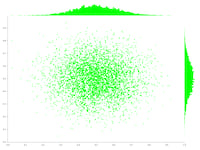
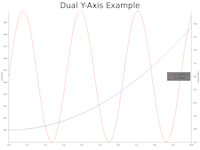
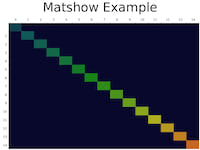
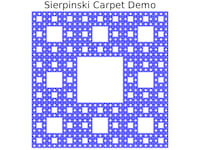
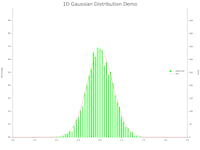
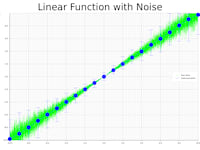
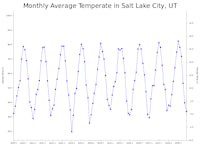
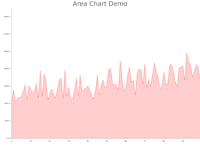


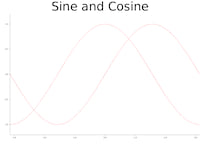

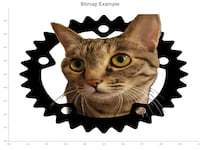
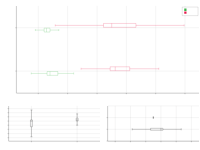
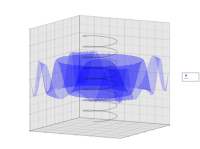
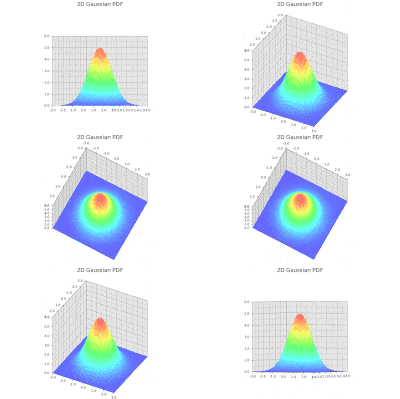
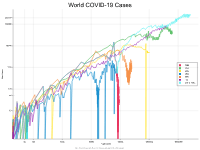
目录
- 画廊
- 依赖项
- 快速开始
- 演示项目
- 使用Jupyter evcxr内核交互式尝试
- Jupyter笔记本的交互式教程
- Rust中的绘图
- 使用WASM后端在HTML5画布上绘图
- 支持哪些类型的图形?
- 通过示例展示概念
- 杂项
- 常见问题解答列表
依赖项
Ubuntu Linux
sudoapt install pkg-config libfreetype6-dev libfontconfig1-dev
快速开始
要使用Plotters,您只需将Plotters添加到您的Cargo.toml
[dependencies]
plotters = "0.3.3"
以下代码绘制了一个二次函数。 src/main.rs,
use plotters::prelude::*;
fn main() -> Result<(), Box<dyn std::error::Error>> {
    let root = BitMapBackend::new("plotters-doc-data/0.png", (640, 480)).into_drawing_area();
    root.fill(&WHITE)?;
    let mut chart = ChartBuilder::on(&root)
        .caption("y=x^2", ("sans-serif", 50).into_font())
        .margin(5)
        .x_label_area_size(30)
        .y_label_area_size(30)
        .build_cartesian_2d(-1f32..1f32, -0.1f32..1f32)?;

    chart.configure_mesh().draw()?;

    chart
        .draw_series(LineSeries::new(
            (-50..=50).map(|x| x as f32 / 50.0).map(|x| (x, x * x)),
            &RED,
        ))?
        .label("y = x^2")
        .legend(|(x, y)| PathElement::new(vec![(x, y), (x + 20, y)], &RED));

    chart
        .configure_series_labels()
        .background_style(&WHITE.mix(0.8))
        .border_style(&BLACK)
        .draw()?;

    root.present()?;

    Ok(())
}

演示项目
要了解如何在不同场景下使用 Plotters,请查看以下演示项目
- WebAssembly + Plotters: plotters-wasm-demo
- minifb + Plotters: plotters-minifb-demo
- GTK + Plotters: plotters-gtk-demo
使用Jupyter evcxr内核交互式尝试
Plotters 现在支持与 evcxr 集成,并能够在与 Jupyter Notebook 交互式地绘制图形。当将 Plotters 包含到 Jupyter Notebook 中时,应启用 evcxr 功能。
以下代码展示了这一最小示例。
:dep plotters = { version = "^0.3.6", default_features = false, features = ["evcxr", "all_series", "all_elements"] }
extern crate plotters;
use plotters::prelude::*;

let figure = evcxr_figure((640, 480), |root| {
    root.fill(&WHITE)?;
    let mut chart = ChartBuilder::on(&root)
        .caption("y=x^2", ("Arial", 50).into_font())
        .margin(5)
        .x_label_area_size(30)
        .y_label_area_size(30)
        .build_cartesian_2d(-1f32..1f32, -0.1f32..1f32)?;

    chart.configure_mesh().draw()?;

    chart.draw_series(LineSeries::new(
        (-50..=50).map(|x| x as f32 / 50.0).map(|x| (x, x * x)),
        &RED,
    )).unwrap()
        .label("y = x^2")
        .legend(|(x,y)| PathElement::new(vec![(x,y), (x + 20,y)], &RED));

    chart.configure_series_labels()
        .background_style(&WHITE.mix(0.8))
        .border_style(&BLACK)
        .draw()?;
    Ok(())
});
figure

Jupyter笔记本的交互式教程
本教程仍在进行中,尚未完成
感谢 evcxr,现在我们有了 Plotters 的交互式教程!要使用交互式笔记本,您必须在计算机上安装 Jupyter 和 evcxr。请按照以下页面上的说明进行操作,以安装它:此页面。
之后,您应该能够在本地启动 Jupyter 服务器并加载教程!
git clone https://github.com/38/plotters-doc-data
cd plotters-doc-data
jupyter notebook
然后选择名为 evcxr-jupyter-integration.ipynb 的笔记本。
此外,此笔记本的静态 HTML 版本可在以下位置找到:此处
Rust中的绘图
Rust 是数据可视化的完美语言。尽管有许多不同语言的成熟可视化库,但 Rust 是最适合这种需求的最佳语言之一。
-
易于使用 Rust 在标准库中内置了一个非常好的迭代器系统。借助迭代器,Rust 中的绘图可以像大多数高级编程语言一样简单。基于 Rust 的绘图库非常易于使用。
-
快速 如果您需要渲染包含数十亿数据点的图形,Rust 是一个不错的选择。Rust 的性能允许您将数据处理步骤和渲染步骤合并为单个应用程序。在高级编程语言中绘图时,例如 JavaScript 或 Python,由于性能考虑,必须在将数据点输入绘图程序之前对其进行下采样。Rust 足够快,可以在单个程序中进行数据处理和可视化。您还可以将图形渲染代码集成到应用程序中,以处理大量数据并在实时中可视化。
-
WebAssembly 支持 Rust 是具有最佳 WASM 支持的语言之一。Rust 中的绘图对于网页上的可视化非常有用,并且与 JavaScript 相比,性能将得到大幅提升。
使用WASM后端在HTML5画布上绘图
Plotters 当前支持一个使用 HTML5 canvas 的后端。要使用 WASM,您只需使用 CanvasBackend 而不是其他后端,所有其他 API 都保持不变!
在以下位置有一个 Plotters + WASM 的小型演示:此处。要尝试部署版本,请按照此 链接 操作。
支持哪些类型的图形?
Plotters 不会局限于任何特定的图形类型。您可以使用 Plotters API 轻松创建自己的图形类型。
Plotters 提供了一些内置的图形类型以方便使用。目前,我们支持线系列、点系列、蜡烛图系列和直方图。该库被设计为能够将多个图形渲染到单个图像中。但 Plotter 的目标是成为一个完全可扩展的平台,以支持任何其他类型的图形。
通过示例展示概念
绘图后端
Plotters 可以使用不同的绘图后端,包括 SVG、位图甚至实时渲染。例如,一个位图绘图后端。
use plotters::prelude::*;
fn main() -> Result<(), Box<dyn std::error::Error>> {
    // Create a 800*600 bitmap and start drawing
    let mut backend = BitMapBackend::new("plotters-doc-data/1.png", (300, 200));
    // And if we want SVG backend
    // let backend = SVGBackend::new("output.svg", (800, 600));
    backend.draw_rect((50, 50), (200, 150), &RED, true)?;
    backend.present()?;
    Ok(())
}

绘图区域
绘图仪使用“绘图区域”这一概念进行布局。绘图仪支持将多个图形整合到单个图像中。这是通过创建子绘图区域来实现的。
除此之外,绘图区域还允许自定义坐标系,通过这种方式,坐标映射将自动由绘图区域完成。
use plotters::prelude::*;
fn main() -> Result<(), Box<dyn std::error::Error>> {
    let root_drawing_area =
        BitMapBackend::new("plotters-doc-data/2.png", (300, 200)).into_drawing_area();
    // And we can split the drawing area into 3x3 grid
    let child_drawing_areas = root_drawing_area.split_evenly((3, 3));
    // Then we fill the drawing area with different color
    for (area, color) in child_drawing_areas.into_iter().zip(0..) {
        area.fill(&Palette99::pick(color))?;
    }
    root_drawing_area.present()?;
    Ok(())
}

元素
在绘图仪中,元素是图形的构建块。所有元素都可以绘制在绘图区域内。有不同类型的内置元素,如线条、文本、圆形等。您也可以在应用程序代码中定义自己的元素。
您还可以将现有元素组合起来构建复杂元素。
要了解更多关于元素系统的信息,请阅读元素模块文档。
use plotters::prelude::*;
fn main() -> Result<(), Box<dyn std::error::Error>> {
    let root = BitMapBackend::new("plotters-doc-data/3.png", (300, 200)).into_drawing_area();
    root.fill(&WHITE)?;
    // Draw an circle on the drawing area
    root.draw(&Circle::new(
        (100, 100),
        50,
        Into::<ShapeStyle>::into(&GREEN).filled(),
    ))?;
    root.present()?;
    Ok(())
}

可组合元素
除了内置元素外,元素还可以组合成我们称之为组合元素的逻辑组。在组合新元素时,目标坐标中的左上角被指定,并使用一个以左上角为 (0,0) 定义的基于像素的坐标用于进一步元素组合。
例如,我们可以有一个包含点及其坐标的元素。
use plotters::prelude::*;
use plotters::coord::types::RangedCoordf32;

fn main() -> Result<(), Box<dyn std::error::Error>> {
    let root = BitMapBackend::new("plotters-doc-data/4.png", (640, 480)).into_drawing_area();

    root.fill(&RGBColor(240, 200, 200))?;

    let root = root.apply_coord_spec(Cartesian2d::<RangedCoordf32, RangedCoordf32>::new(
        0f32..1f32,
        0f32..1f32,
        (0..640, 0..480),
    ));

    let dot_and_label = |x: f32, y: f32| {
        return EmptyElement::at((x, y))
            + Circle::new((0, 0), 3, ShapeStyle::from(&BLACK).filled())
            + Text::new(
                format!("({:.2},{:.2})", x, y),
                (10, 0),
                ("sans-serif", 15.0).into_font(),
            );
    };

    root.draw(&dot_and_label(0.5, 0.6))?;
    root.draw(&dot_and_label(0.25, 0.33))?;
    root.draw(&dot_and_label(0.8, 0.8))?;
    root.present()?;
    Ok(())
}

图表上下文
为了绘制图表,绘图仪需要一个基于绘图区域的名为 ChartContext 的数据对象。图表上下文定义了比绘图区域更高层次的构建。例如,您可以使用图表上下文对象定义标签区域、网格,并将数据系列放置在绘图区域内。
use plotters::prelude::*;
fn main() -> Result<(), Box<dyn std::error::Error>> {
    let root = BitMapBackend::new("plotters-doc-data/5.png", (640, 480)).into_drawing_area();
    root.fill(&WHITE);
    let root = root.margin(10, 10, 10, 10);
    // After this point, we should be able to construct a chart context
    let mut chart = ChartBuilder::on(&root)
        // Set the caption of the chart
        .caption("This is our first plot", ("sans-serif", 40).into_font())
        // Set the size of the label region
        .x_label_area_size(20)
        .y_label_area_size(40)
        // Finally attach a coordinate on the drawing area and make a chart context
        .build_cartesian_2d(0f32..10f32, 0f32..10f32)?;

    // Then we can draw a mesh
    chart
        .configure_mesh()
        // We can customize the maximum number of labels allowed for each axis
        .x_labels(5)
        .y_labels(5)
        // We can also change the format of the label text
        .y_label_formatter(&|x| format!("{:.3}", x))
        .draw()?;

    // And we can draw something in the drawing area
    chart.draw_series(LineSeries::new(
        vec![(0.0, 0.0), (5.0, 5.0), (8.0, 7.0)],
        &RED,
    ))?;
    // Similarly, we can draw point series
    chart.draw_series(PointSeries::of_element(
        vec![(0.0, 0.0), (5.0, 5.0), (8.0, 7.0)],
        5,
        &RED,
        &|c, s, st| {
            return EmptyElement::at(c)    // We want to construct a composed element on-the-fly
            + Circle::new((0,0),s,st.filled()) // At this point, the new pixel coordinate is established
            + Text::new(format!("{:?}", c), (10, 0), ("sans-serif", 10).into_font());
        },
    ))?;
    root.present()?;
    Ok(())
}

杂项
开发版本
您可以在 GitHub 上找到绘图仪的最新开发版本。克隆存储库,了解绘图仪 API 和贡献方式。您的帮助是必要的!
如果您想将绘图仪的开发版本添加到项目中,请将以下内容添加到您的 Cargo.toml
[dependencies]
plotters = { git = "https://github.com/plotters-rs/plotters.git" }
减少依赖库 && 关闭后端
绘图仪现在支持使用功能来控制后端依赖。默认情况下,支持 BitMapBackend 和 SVGBackend,在 Cargo.toml 的依赖描述中使用 default_features = false,您可以选择后端实现。
svg启用SVGBackendbitmap启用BitMapBackend
例如,以下依赖描述将避免使用位图支持进行编译
[dependencies]
plotters = { git = "https://github.com/plotters-rs/plotters.git", default_features = false, features = ["svg"] }
该库还允许消费者默认使用 Palette crate 的颜色类型。此行为也可以通过设置 default_features = false 来关闭。
功能列表
这是由 Plotters crate 定义的完整功能列表。使用 default_features = false 禁用默认启用的功能,然后您应该能够选择要包含到 Plotters crate 中的功能。通过这样做,您可以最小化依赖数量,只保留 itertools,编译时间小于 6 秒。
以下列表是可以选择启用或禁用的功能的完整列表。
- 一级绘图后端
| 名称 | 描述 | 附加依赖 | 默认? |
|---|---|---|---|
| bitmap_encoder | 允许 BitMapBackend 将结果保存到位图文件 |
image, rusttype, font-kit | 是 |
| svg_backend | 启用 SVGBackend 支持 |
无 | 是 |
| bitmap_gif | 支持在 BitMapBackend 中渲染 GIF 动画,意味着 bitmap 已经启用 |
gif | 是 |
- 字体操作功能
| 名称 | 描述 | 附加依赖 | 默认? |
|---|---|---|---|
| ttf | 允许支持 TrueType 字体 | font-kit | 是 |
| ab_glyph | 跳过加载系统字体,与 ttf 不同 |
ab_glyph | 否 |
ab_glyph 支持 TrueType 和 OpenType 字体,但不会尝试加载其运行系统上提供的字体。它是纯 Rust,更容易交叉编译。要使用此功能,您必须在使用任何需要能够渲染文本的 plotters 函数之前调用 plotters::style::register_font。此函数仅在启用 ab_glyph 功能时存在。
/// Register a font in the fonts table.
///
/// The `name` parameter gives the name this font shall be referred to
/// in the other APIs, like `"sans-serif"`.
///
/// Unprovided font styles for a given name will fallback to `FontStyle::Normal`
/// if that is available for that name, when other functions lookup fonts which
/// are registered with this function.
///
/// The `bytes` parameter should be the complete contents
/// of an OpenType font file, like:
/// ```ignore
/// include_bytes!("FiraGO-Regular.otf")
/// ```
pub fn register_font(
    name: &str,
    style: FontStyle,
    bytes: &'static [u8],
) -> Result<(), InvalidFont>
- 坐标功能
| 名称 | 描述 | 附加依赖 | 默认? |
|---|---|---|---|
| datetime | 启用日期和时间坐标支持 | chrono | 是 |
- 元素、系列和实用函数
| 名称 | 描述 | 附加依赖 | 默认? |
|---|---|---|---|
| errorbar | 支持误差条元素 | 无 | 是 |
| candlestick | 支持蜡烛图元素 | 无 | 是 |
| boxplot | 支持箱线图元素 | 无 | 是 |
| area_series | 支持面积序列 | 无 | 是 |
| line_series | 支持线序列 | 无 | 是 |
| histogram | 支持直方图序列 | 无 | 是 |
| point_series | 支持点序列 | 无 | 是 |
- 杂项
| 名称 | 描述 | 附加依赖 | 默认? |
|---|---|---|---|
| deprecated_items | 此功能允许使用即将在将来被删除的已弃用项 | 无 | 是 |
| debug | 启用调试代码 | 无 | 否 |
常见问题解答列表
-
为什么我的机器上的 WASM 示例会中断?
WASM 示例需要使用
wasm32目标进行构建。使用cargo build可能会使用默认目标,这在大多数情况下是任一 x86 目标。因此,您需要在 cargo 参数列表中添加--target=wasm32-unknown-unknown以构建它。 -
如何在图表顶部绘制文本/圆/点/矩形/...?
如您所意识到的,Plotters 是一个绘图库,而不是传统的数据绘图库,您可以在绘图区域绘制任何您想要的内容。使用
DrawingArea::draw在绘图区域绘制任何元素。 -
在哪里可以找到后端代码?
从 Plotters 0.3 开始,所有绘图后端都是独立于主 Plotters 包的 crate。使用以下链接查找后端代码
- 位图后端(当前存储库)
- SVG 后端(当前存储库)
- HTML5 Canvas 后端
- GTK/Cairo 后端
-
如何检查后端是否成功写入文件?
Plotters 后端的行为与标准库一致。当后端实例被丢弃时,[
crate::drawing::DrawingArea::present()] 或Backend::present()将在需要时自动调用。当从drop调用present()方法时,任何错误都将被静默忽略。在错误处理很重要的情况下,您需要在后端被丢弃之前手动调用
present()方法。有关更多信息,请参阅示例。
依赖项
~4–15MB
~174K SLoC