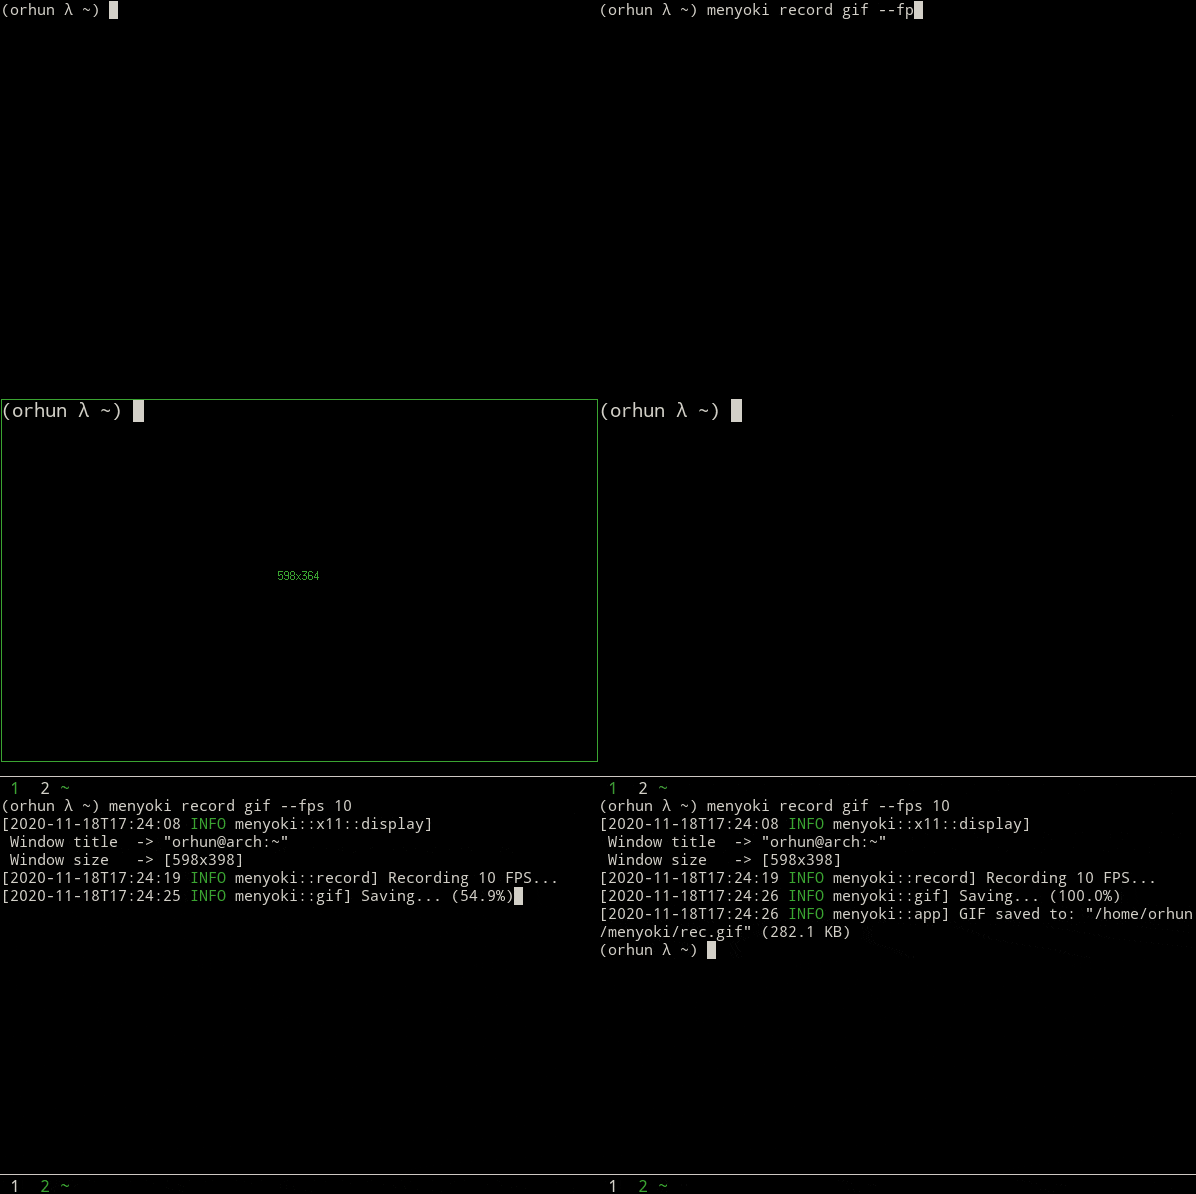
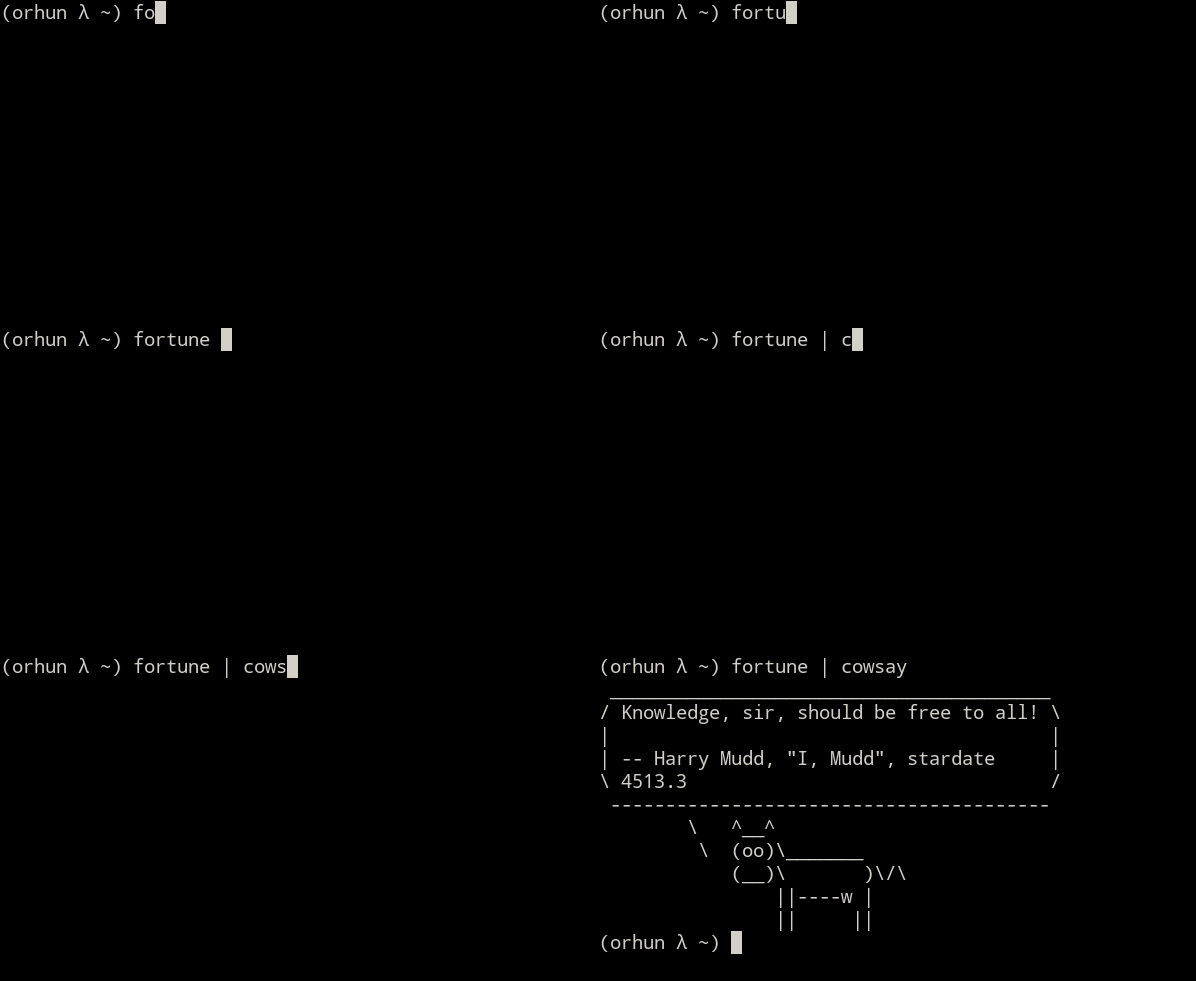
23 个版本 (稳定)
| 1.7.0 | 2023年3月1日 |
|---|---|
| 1.6.1 | 2022年7月17日 |
| 1.6.0 | 2022年3月7日 |
| 1.5.5 | 2021年10月22日 |
| 0.1.3 | 2020年11月25日 |
在 多媒体 类别中排名第 297
每月 82 次下载
245KB
6K SLoC
menyoki 是一个屏幕录制和截图实用工具,还可以执行各种图像相关操作,例如制作/分割 GIF、修改/分析/查看图像文件。它的目标是成为一个轻量级的命令行工具,用于帮助处理日常操作或复杂的细节问题。最初它被设计用来录制/截图终端窗口,但它可以通过命令行参数、环境变量或配置文件轻松修改以用于其他目的。
目录
支持的平台
menyoki 需要支持平台的 记录 和 捕获 操作的窗口系统 实现。由于它们不需要运行(或抓取窗口来操作),其他功能预计将正常工作。例如,尽管 macOS 并未列为支持的平台,但如果在 macOS 上编译,menyoki 仍然可以执行如 编辑、分析 和 查看 等图像操作。
支持的格式
安装
要求
- Rust:
1.56.1+ - 依赖关系
- Arch Linux:
libx11,libxrandr - Debian, Ubuntu:
libx11-dev/librust-x11-dev,libxrandr-dev - Fedora:
libX11-devel,libXrandr
- Arch Linux:
Cargo
menyoki 可以通过 crates.io 使用 cargo 安装,前提是已经安装了 Rust。
cargo install menyoki
使用 --force 选项进行更新。
cargo install menyoki --force
Arch Linux
menyoki 可以从 Arch Linux 的 社区仓库 安装。
pacman -S menyoki
或者,如果您愿意,可以使用可用的 AUR 软件包 进行安装。
- 使用 AUR 辅助工具
paru menyoki
- 克隆软件包,并使用 makepkg 编译它
git clone https://aur.archlinux.org/menyoki-git.git
cd menyoki-git
makepkg -si
Docker
Docker Hub
从 Docker Hub 下载 orhunp/menyoki 镜像(查看可用的 标签)
docker pull orhunp/menyoki:<tag>
运行容器
docker run orhunp/menyoki:<tag>
构建镜像
在克隆仓库后,您可以从 Dockerfile 构建镜像
docker build -t menyoki .
然后您可以运行容器
docker run menyoki
或通过运行 it 交互式地启动容器内的 shell
docker run -it menyoki /bin/bash
手册
从源代码
- 克隆仓库。
git clone https://github.com/orhun/menyoki.git && cd menyoki/
- 构建项目和安装二进制文件。
cargo install --path .
版本
- 从 发行版页面 下载最新存档并提取它。
- 将
menyoki二进制文件移动到/usr/local/bin/(Linux)
功能
用法
| 操作 |  |
|---|---|
| 结果 |  |
menyoki 的命令行参数设计得尽可能直观。因此,可以通过一系列子命令以及标志和选项执行操作。命令行参数使用的一般原型如下
menyoki(ACTION) (FORMAT) (OUTPUT)
表示 action 的子命令是必须的,而 format 和 output 子命令可能是可选的(或者可能根本不存在)。format 子命令可以是支持的格式之一,而 output基本上对应于 保存 子命令。
如果没有指定用于指定 format 的子命令,则默认 format 是列出的第一个子命令。另一方面,save 子命令使用 home 目录中的 "menyoki" 目录(如果存在则使用 images 目录)作为默认输出目录。
一般 
在指定要执行的主要操作之前,可以设置将影响 menyoki 执行的标志和选项。然后必须指定主要子命令(操作)。
menyoki[FLAGS] [OPTIONS] <SUBCOMMAND>
参数
FLAGS:
    -h, --help       Print help information
    -V, --version    Print version information
    -v, --verbose    Increase logging verbosity
    -q, --quiet      Do not show output

OPTIONS:
    -c, --config <FILE>    Set the configuration file
        --color <HEX>      Set the main color [default: 3AA431]

SUBCOMMANDS:
    record     Record an animation
    split      Split an animation into frames
    make       Make an animation from frames
    capture    Capture an image
    edit       Edit an image
    analyze    Analyze an image
    view       View an image
示例
| 命令 | 操作 |
|---|---|
menyoki-V |
打印版本信息 |
menyoki-vv--颜色FF00FF <动作> |
将日志详细程度设置为 2(跟踪)并使用 "FF00FF" 作为主颜色 |
menyoki-q-c menyoki.conf<动作> |
以静默模式运行并从 "menyoki.conf" 读取配置 |
记录 
menyoki 可以记录窗口区域或整个屏幕,并将其编码为支持的格式。区域选择和调整大小是通过键绑定完成的。
一些 record 动作可能很有用的场景包括
- 记录窗口的特定区域
- 记录指定的时间长度
- 记录命令的输出(特别是对于 TUI 应用程序)
可以使用提供的格式的参数更改编码选项。(参见 menyoki record gif --help 的输出)
menyoki record[FLAGS] [OPTIONS] [COMMAND] [SUBCOMMAND]
参数
FLAGS:
    -r, --root          Record the root window
    -f, --focus         Record the focused window
        --select        Select the window to record
        --parent        Record the parent of the window
        --with-alpha    Record with the alpha channel
        --no-keys       Disable the action keys while recording
    -m, --mouse         Select the window with mouse click
    -h, --help          Print help information

OPTIONS:
        --action-keys <KEYS>    Set the action keys [default: LAlt-S,LAlt-Enter]
        --cancel-keys <KEYS>    Set the cancel keys [default: LControl-D,Escape]
    -b, --border <BORDER>       Set the border width [default: 1]
    -p, --padding <T:R:B:L>     Set the record area padding
    -s, --size <WxH>            Set the record area size
    -d, --duration <S>          Set the duration for recording [default: ∞]
    -c, --countdown <S>         Set the countdown before recording [default: 3]
    -t, --timeout <S>           Set the timeout for window selection [default: 300]
    -i, --interval <MS>         Set the refresh interval for window selection [default: 10]
        --font <FONT>           Set the font to use for window selection
        --monitor <NUM>         Set the monitor to record as root window

ARGS:
    <COMMAND>    Set the command to run

SUBCOMMANDS:
    gif     Use the GIF encoder
    apng    Use the APNG encoder
    save    Save the output file(s)
示例
| 命令 | 操作 |
|---|---|
menyoki record |
选择窗口并使用默认设置开始记录 |
menyoki record--root--countdown5 |
倒计时 5 秒后记录根窗口 |
menyoki record--focus--with-alpha |
记录具有 alpha 通道(用于透明度)的聚焦窗口 |
menyoki record--size 200x300--duration10 |
记录 200x300 大小的区域 10 秒 |
menyoki record--padding20:10:0:10 --timeout120 |
记录具有给定填充的区域,并将窗口选择超时设置为 120 秒 |
menyoki record--parent |
记录所选窗口的父窗口 |
menyoki record--root--select--monitor1 |
将第一个监视器作为根窗口记录 |
menyoki record--border5 |
记录宽度为 5 的边框所选择的区域 |
menyoki record--动作-keys LControl-Q,LAlt-W |
使用自定义键绑定以默认设置记录 |
menyoki record--cancel-keys LControl-X,E |
使用自定义键绑定以默认设置记录 |
menyoki record gif--fps15 --quality90 |
以每秒 15 帧的速度记录,质量为 90% |
menyoki record gif--gifski |
使用 gifski 编码器记录和编码 |
menyoki record gif save"test.gif" --timestamp |
以带时间戳的文件名 "test.gif" 记录和保存 |
menyoki record apng--fps30 |
以每秒 30 帧的速度记录并编码为 APNG |
menyoki-q record save"-" >test.gif |
记录并将输出重定向到 "test.gif" |
menyoki-q record save"-" |xclip-selection clipboard-t image/gif |
记录并将输出通过 xclip 的剪贴板选择管道输出,指定目标为 gif |
menyoki-q record"kmon -t 2000" |
执行命令并在静默模式下记录其输出 |
menyoki record--font"-*-dejavu sans-*-*-*-*-17-*-*-*-*-*-*-*" |
使用自定义字体显示区域大小(参见 xfontsel) |
技巧
使用 slop 通过鼠标交互选择根窗口(全屏)的区域。
menyoki record --root --size $(slop)
分割 
menyoki 可以在提供 split 子命令的情况下将动画分割成帧(提取图像),并可以使用后续的 format 子命令将帧保存为支持的格式之一。
menyoki split[OPTIONS] <FILE> [SUBCOMMAND]
参数
FLAGS:
    -h, --help    Print help information

OPTIONS:
    -d, --dir <DIRECTORY>    Set the output directory

ARGS:
    <FILE>    Set the animation file

SUBCOMMANDS:
    png     Use the PNG encoder
    jpg     Use the JPG encoder
    webp    Use the WebP encoder
    bmp     Use the BMP encoder
    ico     Use the ICO encoder
    tiff    Use the TIFF encoder
    tga     Use the TGA encoder
    pnm     Use the PNM encoder
    ff      Use the farbfeld encoder
    exr     Use the OpenEXR encoder
示例
| 命令 | 操作 |
|---|---|
menyoki split rec.gif |
从 "rec.gif" 文件中提取帧 |
menyoki split rec.gif jpg--quality100 |
以最高质量提取帧为 JPEG |
menyoki split rec.gif--dir frames/ |
提取帧并将它们保存到指定的目录 |
制作 
make 子命令的目的是从一个图像集中创建一个动画。例如,它可以通过命令行或指定的目录制作 GIF。
menyoki make[FLAGS] [OPTIONS] <FRAMES>... [SUBCOMMAND]
参数
FLAGS:
        --gifski     Use the gifski encoder
        --fast       Encode 3 times faster (gifski)
    -n, --no-sort    Use frames in the order given
    -h, --help       Print help information

OPTIONS:
    -f, --fps <FPS>            Set the FPS [default: 20]
    -q, --quality <QUALITY>    Set the frame quality (1-100) [default: 75]
    -r, --repeat <REPEAT>      Set the number of repetitions [default: ∞]
    -d, --dir <DIRECTORY>      Set the directory to read frames
        --format <FORMAT>      Set the animation format [default: gif]  [possible values: gif, apng]

ARGS:
    <FRAMES>...    Set the animation frames

SUBCOMMANDS:
    save    Save the output file(s)
示例
| 命令 | 操作 |
|---|---|
menyoki make1.png2.png |
制作由 "1.png" 和 "2.png" 组成的两个帧的 GIF |
menyoki make1.png2.png--fps5 --quality100 |
从给定的帧制作具有指定属性的 GIF |
menyoki make1.png2.png save3.gif--date |
制作 GIF 并以带日期信息的文件("3.gif")保存 |
menyoki make1.png2.png--format apng |
从给定的帧制作 APNG |
menyoki make--dir frames/ |
从指定目录中的帧制作 GIF |
捕获 
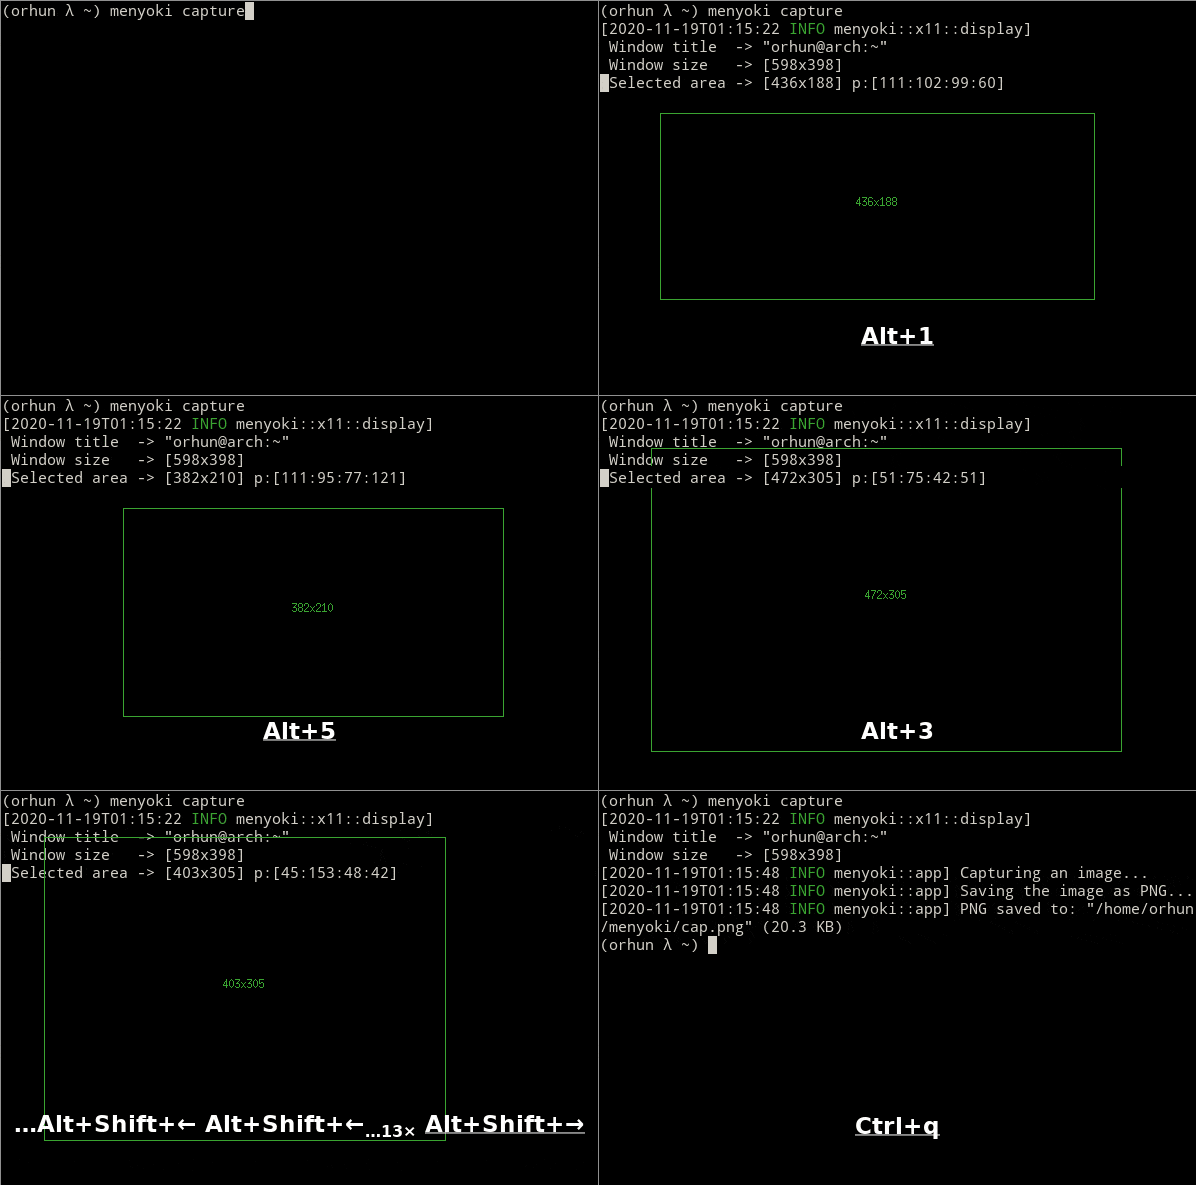
menyoki 可以捕获(截图)窗口的某个区域或整个屏幕,并将其编码为支持的格式。如 png、jpg 和 pnm 等格式具有自己的标志和选项,可用于更改默认编码设置。与 record 子命令类似,区域选择和调整大小是通过键绑定进行的。由于动作在抽象上类似,因此 record 和 capture 子命令可能适用相同的标志和选项。
menyoki capture[FLAGS] [OPTIONS] [COMMAND] [SUBCOMMAND]
参数
FLAGS:
    -r, --root          Capture the root window
    -f, --focus         Capture the focused window
        --select        Select the window to capture
        --parent        Record the parent of the window
        --with-alpha    Capture with the alpha channel
    -m, --mouse         Select the window with mouse click
    -h, --help          Print help information

OPTIONS:
        --action-keys <KEYS>    Set the action keys [default: LAlt-S,LAlt-Enter]
        --cancel-keys <KEYS>    Set the cancel keys [default: LControl-D,Escape]
    -b, --border <BORDER>       Set the border width [default: 1]
    -p, --padding <T:R:B:L>     Set the capture area padding
    -s, --size <WxH>            Set the capture area size
    -c, --countdown <S>         Set the countdown before capturing [default: 0]
    -t, --timeout <S>           Set the timeout for window selection [default: 300]
    -i, --interval <MS>         Set the refresh interval for window selection [default: 10]
        --font <FONT>           Set the font to use for window selection
        --monitor <NUM>         Set the monitor to capture as root window

ARGS:
    <COMMAND>    Set the command to run

SUBCOMMANDS:
    png     Use the PNG encoder
    jpg     Use the JPG encoder
    webp    Use the WebP encoder
    bmp     Use the BMP encoder
    ico     Use the ICO encoder
    tiff    Use the TIFF encoder
    tga     Use the TGA encoder
    pnm     Use the PNM encoder
    ff      Use the farbfeld encoder
    exr     Use the OpenEXR encoder
    save    Save the output file(s)
示例
| 命令 | 操作 |
|---|---|
menyoki capture |
选择窗口并使用默认设置截图 |
menyoki capture--root--countdown5 |
倒计时 5 秒后截图根窗口 |
menyoki capture--focus--with-alpha |
使用透明通道(透明度)截图当前聚焦窗口 |
menyoki capture--size 200x300--duration10 |
截图大小为 200x300 的区域 10 秒 |
menyoki capture--padding20:10:0:10 --timeout120 |
截图具有给定填充的区域,并将窗口选择超时设置为 120 秒 |
menyoki capture--mouse |
点击鼠标截图所选窗口 |
menyoki capture png--filter avg--compression fast |
使用指定的 PNG 选项截图和编码 |
menyoki capture jpg--quality100 |
使用指定的 JPEG 选项截图和编码 |
menyoki capture webp--lossless |
使用指定的 WEBP 选项截图和编码 |
menyoki capture pnm--format pixmap--encoding ascii |
使用指定的 PNM 选项截图和编码 |
menyoki capture ff save"test.ff" --timestamp |
以带时间戳的 farbfeld 格式截图并保存为 "test.ff" |
menyoki-q capture png save"-" >test.png |
截图并将输出重定向到 "test.png" |
menyoki-q capture png save"-" |xclip-selection clipboard-t image/png |
截图并将输出管道传输到 xclip 的剪贴板选择,指定 image/png 目标 |
menyoki-q capture"kmon -t 2000" |
在静默模式下执行命令并截图其输出(隐式地将倒计时设置为 3) |
另外,还可以查看有关 --size 参数的 技巧。
编辑 
edit 子命令可以用来编辑(操作/过滤/转换)支持格式的文件之一。除了 edit 提供的标志和选项外,还可以通过 format 子命令指定其他编码选项。
menyoki edit[FLAGS] [OPTIONS] <FILE> [SUBCOMMAND]
参数
FLAGS:
        --convert      Convert image using the given encoder
        --grayscale    Convert image to grayscale
        --invert       Invert the colors of the image
    -h, --help         Print help information

OPTIONS:
        --crop <T:R:B:L>             Apply padding to crop the image
        --resize <WxH>               Resize the image without keeping the aspect ratio
        --ratio <RATIO>              Resize the image proportionally by aspect ratio [default: 1.0]
        --rotate <ROTATE>            Rotate the image (clockwise) [possible values: 90, 180, 270]
        --flip <FLIP>                Flip the image [possible values: horizontal, vertical]
        --blur <SIGMA>               Blur the image [default: 0.0]
        --hue <HUE>                  Adjust the hue of the image [default: ±0]
        --contrast <CONTRAST>        Adjust the contrast of the image [default: ±0.0]
        --brightness <BRIGHTNESS>    Adjust the brightness of the image [default: ±0]
        --filter <FILTER>            Set the sampling filter for scaling [default: lanczos3]  [possible values: nearest, triangle, catmull-rom, gaussian,
                                     lanczos3]

ARGS:
    <FILE>    Set the input file

SUBCOMMANDS:
    gif     Use the GIF encoder
    apng    Use the APNG encoder
    png     Use the PNG encoder
    jpg     Use the JPG encoder
    webp    Use the WebP encoder
    bmp     Use the BMP encoder
    ico     Use the ICO encoder
    tiff    Use the TIFF encoder
    tga     Use the TGA encoder
    pnm     Use the PNM encoder
    ff      Use the farbfeld encoder
    exr     Use the OpenEXR encoder
    save    Save the output file(s)
示例
| 命令 | 操作 |
|---|---|
menyoki edit test.png |
不编辑重编码 "test.png" 文件 |
menyoki edit test.png--灰度 |
将图像转换为灰度 |
menyoki edit test.png--反转 |
反转图像的颜色 |
menyoki edit test.png--裁剪20:20:20:20 |
应用给定的填充进行裁剪 |
menyoki edit test.png--调整大小 300x300 |
将图像调整大小为 300x300(不保持宽高比) |
menyoki edit test.png--比例0.5 |
将图像调整大小为一半的大小(使用宽高比) |
menyoki edit test.png--比例2.0 --高斯滤波 |
使用指定的采样滤波器调整图像大小 |
menyoki edit test.png--旋转90 |
将图像顺时针旋转 90 度 |
menyoki edit test.png--水平翻转 |
水平翻转图像 |
menyoki edit test.png--模糊2.0 |
模糊图像 |
menyoki edit test.png--色调100 |
调整图像的色调 |
menyoki edit test.png--对比度-10.5 |
调整图像的对比度 |
menyoki edit test.png--亮度50 |
调整图像的亮度 |
menyoki edit test.png--转换为 tga |
将图像转换为 TGA 格式 |
menyoki edit test.png--转换为 jpg--quality80 |
以 80% 的质量将图像转换为 JPEG |
menyoki edit test.gif--比例0.25gif--quality80 |
调整大小并重新编码 "test.gif" |
menyoki edit test.gif gif--速度0.5 |
减慢 GIF 速度(减半) |
menyoki edit test.gif gif--切割-开始1.0 --切割-结束0.5 |
通过秒数切割 GIF 持续时间 |
menyoki edit test.apng--转换 gif |
将 APNG 转换为 GIF |
menyoki edit test.ff--灰度--转换 pnm--格式任意保存"输出" --with-扩展名--date"%H%M%S" |
test.ff(farbfeld)-> 灰度 -> 输出_020035.pam(PNM) |
分析 
analyze 子命令用于检查支持的格式的图像文件,并根据图像详细信息创建报告。报告包括 2 到 3 个部分,即文件、图像和 EXIF 信息。
menyoki analyze[FLAGS] [OPTIONS] <FILE> [SUBCOMMAND]
参数
FLAGS:
        --timestamp    Use Unix timestamp for report dates
    -h, --help         Print help information

OPTIONS:
    -t, --time-zone <TIMEZONE>    Set the time zone of the report [default: utc]  [possible values: utc, local]

ARGS:
    <FILE>    Set the image file

SUBCOMMANDS:
    save    Save the output file(s)
示例
| 命令 | 操作 |
|---|---|
menyoki analyze test.jpg |
检查 "test.jpg" 并打印报告 |
menyoki analyze test.jpg save test_report.txt |
检查 "test.jpg" 并将报告保存为 "test_report.txt" |
menyoki analyze test.jpg--timestamp |
根据时间戳检查文件并创建报告 |
menyoki analyze test.jpg--时间-时区 本地 |
根据本地时区检查文件并创建报告 |
menyoki analyze test.jpg--时间戳保存--timestamp |
在分析报告和文件名中都使用时间戳 |
示例报告
menyoki - image analysis report

File Information
  File:     "Canon_40D.jpg" (8.0 KB)
  Created:  2020-11-11 231334.850884475 UTC
  Modified: 2020-11-11 231334.850884475 UTC
  Accessed: 2020-11-11 231404.647510552 UTC

Image Information
  Format:     JPEG
  Dimensions: 100x68px
  Color Type: RGB8
  Main Colors:
   • #433D2BFF
   • #989069FF
   • #8B7458FF
   • #ADA791FF

EXIF Data
  Make: "Canon"
  Model: "Canon EOS 40D"
  Orientation: row 0 at top and column 0 at left
  XResolution: 72 pixels per inch
  YResolution: 72 pixels per inch
  ResolutionUnit: inch
  Software: "GIMP 2.4.5"
  DateTime: 2008-07-31 103811
  YCbCrPositioning: co-sited
  ExposureTime: 1/160 s
  FNumber: f/7.1
  ExposureProgram: manual
  PhotographicSensitivity: 100
  ExifVersion: 2.21
  DateTimeOriginal: 2008-05-30 155601
  DateTimeDigitized: 2008-05-30 155601
  ComponentsConfiguration: YCbCr_
  ShutterSpeedValue: 7.375 EV
  ApertureValue: 5.625 EV
  ExposureBiasValue: 0 EV
  MeteringMode: pattern
  Flash: fired, no return light detection function, forced
  FocalLength: 135 mm
  UserComment: (530 bytes binary data)
  SubSecTime: "00"
  SubSecTimeOriginal: "00"
  SubSecTimeDigitized: "00"
  FlashpixVersion: 1.0
  ColorSpace: sRGB
  PixelXDimension: 100 pixels
  PixelYDimension: 68 pixels
  InteroperabilityIndex: "R98"
  InteroperabilityVersion: 1.00
  FocalPlaneXResolution: 4438.356164383562 pixels per inch
  FocalPlaneYResolution: 4445.969125214408 pixels per inch
  FocalPlaneResolutionUnit: inch
  CustomRendered: normal process
  ExposureMode: manual exposure
  WhiteBalance: auto white balance
  SceneCaptureType: standard
  GPSVersionID: 2.2.0.0
  Compression: JPEG (T)
  XResolution: 72 pixels per inch (T)
  YResolution: 72 pixels per inch (T)
  ResolutionUnit: inch (T)
  JPEGInterchangeFormat: 1090 (T)
  JPEGInterchangeFormatLength: 1378 (T)

generated on 2020-11-11 23:14:04.652826438 UTC
查看 
view 子命令可以用来在终端中简单地查看图像。它使用 viu 的核心库。
menyoki view[FLAGS] <FILE>
参数
FLAGS:
    -t, --transparent    Display transparent image with transparent background
    -h, --help           Print help information

ARGS:
    <FILE>    Set the input file
示例
| 命令 | 操作 |
|---|---|
menyoki view test.jpg |
在终端中查看 "test.jpg" |
menyoki view test.png--透明 |
在启用透明度的情况下,在终端中查看 "test.png" |
其他 
可以通过指定对应子命令的标志/选项来更改 GIF、APNG、PNG、JPG 和 PNM 的编码选项。此外,可以使用 save 子命令更改默认输出设置。
GIF/APNG
FLAGS:
        --gifski    Use the gifski encoder         <only in GIF>
        --fast      Encode 3 times faster (gifski) <only in GIF>
    -h, --help    Print help information

OPTIONS:
    -f, --fps <FPS>            Set the FPS [default: 20]
    -q, --quality <QUALITY>    Set the frame quality (1-100) [default: 75] <only in GIF>
    -r, --repeat <REPEAT>      Set the number of repetitions [default: ∞]
    -s, --speed <SPEED>        Set the GIF speed [default: 1.0]
        --cut-beginning <S>    Cut the beginning of the GIF [default: 0.0]
        --cut-end <S>          Cut the end of the GIF [default: 0.0]

SUBCOMMANDS:
    save    Save the output file(s)
(某些选项可能仅适用于特定操作)
PNG
FLAGS:
    -h, --help    Print help information

OPTIONS:
    -c, --compression <COMPRESSION>    Set the compression level [default: fast]  [possible values: default, fast, best]
    -f, --filter <FILTER>              Set the filter algorithm [default: sub]  [possible values: none, sub, up, avg, paeth]

SUBCOMMANDS:
    save    Save the output file(s)
JPG
FLAGS:
    -h, --help    Print help information

OPTIONS:
    -q, --quality <QUALITY>    Set the image quality (1-100) [default: 90]

SUBCOMMANDS:
    save    Save the output file(s)
WEBP
FLAGS:
    -l, --lossless    Use lossless encoding
    -h, --help        Print help information

OPTIONS:
    -q, --quality <QUALITY>    Set the lossy encoding quality (1-100) [default: 80]

SUBCOMMANDS:
    save    Save the output file(s)
PNM
FLAGS:
    -h, --help    Print help information

OPTIONS:
    -f, --format <FORMAT>        Set the PNM format [default: pixmap]  [possible values: bitmap, graymap, pixmap, arbitrary]
    -e, --encoding <ENCODING>    Set the encoding for storing the samples [default: binary]  [possible values: binary, ascii]

SUBCOMMANDS:
    save    Save the output file(s)
保存
FLAGS:
    -e, --with-extension    Always save the file with an extension
    -t, --timestamp         Add Unix timestamp to the file name
    -h, --help              Print help information

OPTIONS:
    -d, --date <FORMAT>    Add formatted date/time to the file name [default: %Y%m%dT%H%M%S]

ARGS:
    <FILE>    Set the output file
快捷键
仅在执行 capture 或 record 操作时使用和显示键绑定。本质上,键绑定用于选择捕获/记录区域并调整它们,而无需任何鼠标交互。
根据执行动作,键绑定有3种类型
- 动作键(主要动作键,如
LAlt-S,可以通过--action-keys和--cancel-keys选项进行自定义) - 取消键(将取消操作的键,例如
LControl-D) - 其他键(可用于调整选定区域的键,如
LAlt-[up])
| 键 | 操作 |
|---|---|
LAlt-[S/Enter] |
开始/停止录制或截图选定区域 |
LControl-D,Escape |
取消当前操作 |
LControl-C |
取消当前操作或停止录制 |
LAlt-[箭头键/hjkl] |
增加区域填充(减小区域大小) |
LControl-LAlt-[箭头键/hjkl] |
减小区域填充(增加区域大小) |
LShift-LAlt-[箭头键/hjkl] |
重新定位选定区域(移动) |
LAlt-[1-9] |
设置调整区域大小的速度因子(默认:3) |
LAlt-R |
将区域填充重置为默认值 |

配置
可以通过配置文件覆盖默认命令行参数。可以通过 --config 选项或 $MENYOKI_CONFIG 环境变量来指定。此外,它还可以放置到 menyoki 默认查找的位置
{CONFIG_DIR}/menyoki.conf{CONFIG_DIR}/menyoki/menyoki.conf{CONFIG_DIR}/menyoki/配置
{CONFIG_DIR} 根据平台可以是以下之一
- Linux:
$XDG_CONFIG_HOME或$HOME/.config- 例如
/home/orhun/.config
- 例如
- macOS:
$HOME/Library/Application Support- 例如
/Users/Orhun/Library/Application Support
- 例如
- Windows:
{FOLDERID_RoamingAppData}- 例如
C:\Users\Orhun\AppData\Roaming
- 例如
默认配置文件*
[general]
verbose = 0
quiet = false
color = 3AA431

[record]
root = false
focus = true
select = true
parent = false
with-alpha = false
no-keys = false
mouse = false
action-keys = LAlt-S,LAlt-Enter
cancel-keys = LControl-D,Escape
border = 1
#padding = T:R:B:L
#size = WxH
duration = ∞
countdown = 3
timeout = 300
interval = 10
#font =
#monitor =
#command =

[split]
#dir =
#file =

[make]
#no-sort = false
fps = 20
quality = 75
repeat = ∞
#dir =
format = gif

[capture]
root = false
focus = true
select = true
parent = false
with-alpha = false
mouse = false
action-keys = LAlt-S,LAlt-Enter
cancel-keys = LControl-D,Escape
border = 1
#padding = T:R:B:L
#size = WxH
countdown = 0
timeout = 300
interval = 10
#font =
#monitor =
#command =

[edit]
convert = false
grayscale = false
invert = false
#crop = T:R:B:L
#resize = WxH
ratio = 1.0
#rotate =
#flip =
blur = 0.0
hue = ±0
contrast = ±0.0
brightness = ±0
filter = lanczos3
#file =

[analyze]
timestamp = false
time-zone = utc
#file =

[view]
transparent = false
#file =

[save]
with-extension = false
timestamp = false
date = %Y%m%dT%H%M%S
#file =

[gif]
gifski = false
fast = false
fps = 20
quality = 75
repeat = ∞
speed = 1.0
cut-beginning = 0.0
cut-end = 0.0

[apng]
fps = 20
repeat = ∞
speed = 1.0
cut-beginning = 0.0
cut-end = 0.0

[png]
compression = fast
filter = sub

[jpg]
quality = 90

[webp]
quality = 80
lossless = false

[pnm]
format = pixmap
encoding = binary
环境变量
可以设置相应的环境变量以覆盖命令行标志和选项。 menyoki 检查的变量的一般原型如下
MENYOKI_{SECTION}_{ARGUMENT}=value
示例
| 命令 | 环境变量 |
|---|---|
menyoki--quiet |
MENYOKI_GENERAL_QUIET=true |
menyoki record gif--fps10save--timestamp |
MENYOKI_GIF_FPS=10 MENYOKI_SAVE_TIMESTAMP=true |
menyoki capture--size 200x300 jpg--quality100 |
MENYOKI_CAPTURE_SIZE=200x300MENYOKI_JPG_QUALITY=100 |
menyoki edit test.png--比例2.0 --filter triangle |
MENYOKI_EDIT_RATIO=2.0 MENYOKI_EDIT_FILTER=triangle |
menyoki split test.gif--dir frames/pnm--format graymap |
MENYOKI_SPLIT_DIR=frames/ MENYOKI_PNM_FORMAT=graymap |
menyoki analyze test.png--时间戳保存--date%H%M%S |
MENYOKI_ANALYZE_TIMESTAMP=true MENYOKI_SAVE_DATE=%H%M%S |
menyoki view test.png--透明 |
MENYOKI_VIEW_TRANSPARENT=true |
路线图
以下 menyoki 项目的最终目标。
无障碍访问
menyoki 应该为其他发行版和软件包管理器(如 Nixpkgs 和 Homebrew)打包,以便易于访问和安装。
平台
支持的平台列表应通过在各个系统上实现menyoki的核心功能来扩展。(参见#2,#4和#5)
格式
menyoki应实现image-rs支持的编码所有图像格式。同时,也应考虑实现其他图像和视频格式,以编码record/capture操作中的帧。(参见支持格式)
优化
一些格式如GIF的编码/解码可能需要优化速度和效率。根据这种情况下的基准测试,应考虑替代方法和选项。
测试
menyoki应在不同平台上进行测试,必须报告错误以进行进一步的开发和支持。
资源
关于项目
为什么叫“menyoki”?
这是作者从游戏Patapon 2中喜欢的角色的参考。

Menyokki(也称为Tree-Pon,因为他看起来像一棵树)是Patapon 2中引入的一种Rarepon。它的进化形态是Kisuk,最终形态是Moriussoo。这些Rarepons是绿色的,类似于不同发育阶段的植物:Menyokki是幼苗,Kisuk是树苗,Moriussoo是成熟大树。
用作项目标志的Menyokki精灵最初是由OwocekTV为粉丝制作的游戏Patafour绘制的。他也是Patafour的创造者和首席开发者,他正与团队一起努力将Patapon系列的第四部长期期待的作品变为现实。
感谢owodzeg为Patafour所做的辛勤工作以及为menyoki标志提供的帮助。干得好!
社交媒体
资金
如果您喜欢menyoki和/或我的GitHub个人资料上的其他项目,请考虑在GitHub Sponsors或Patreon上支持我!
许可证
GNU通用公共许可证(v3.0)
版权
版权所有 © 2020-2023,Orhun Parmaksız
依赖关系
~20–54MB
~731K SLoC


