24 个稳定版本
| 1.1.69 | 2023 年 12 月 11 日 |
|---|---|
| 1.1.68 | 2023 年 8 月 31 日 |
| 1.1.66 | 2023 年 7 月 7 日 |
| 1.1.63 | 2023 年 6 月 28 日 |
| 1.0.6 | 2022 年 10 月 20 日 |
#598 in 网络编程
89 每月下载量
9.5MB
13K SLoC
RustHound
![]()
摘要
限制
并非所有 SharpHound 功能都已在 RustHound 中实现。一些存在于 RustHound 中,而不存在于 SharpHound 或 BloodHound-Python 中。有关更多信息,请参阅路线图。
描述
RustHound 是一个用 Rust 编写的 跨平台 BloodHound 收集工具,兼容 Linux、Windows 和 macOS。
无 AV 检测和 交叉编译。
RustHound 生成用户、组、计算机、OU、GPO、容器和域 JSON 文件,可以使用 BloodHound 分析。
💡 如果可以使用 SharpHound,请使用它。如果 SharpHound 被AV检测到或与您的操作系统不兼容,请将 RustHound 作为备份解决方案使用。
如何编译它?
使用 Makefile
您可以使用 make 命令安装 RustHound 或为 Linux 或 Windows 编译它。
make install
rusthound -h
Makefile 中的更多命令
Default:
usage: make install
usage: make uninstall
usage: make debug
usage: make release

Static:
usage: make windows
usage: make windows_x64
usage: make windows_x86
usage: make linux_aarch64
usage: make linux_x86_64
usage: make linux_musl
usage: make macos
usage: make arm_musl
usage: make armv7

Without cli argument:
usage: make windows_noargs

Dependencies:
usage: make install_windows_deps
usage: make install_linux_musl_deps
usage: make install_macos_deps
使用 Dockerfile
使用 Docker 使用 RustHound 确保拥有所有依赖项。
docker build --rm -t rusthound .

# Then
docker run --rm -v ./:/usr/src/rusthound rusthound windows
docker run --rm -v ./:/usr/src/rusthound rusthound linux_musl
docker run --rm -v ./:/usr/src/rusthound rusthound macos
使用 Cargo
您需要在您的系统上安装 Rust。
https://rust-lang.net.cn/fr/tools/install
RustHound 支持 Kerberos 和 GSSAPI。因此,它需要 Clang 及其开发库以及 Kerberos 开发库。在 Debian 和 Ubuntu 上,这意味着 clang-N、libclang-N-dev 和 libkrb5-dev。
例如
# Debian/Ubuntu
sudo apt-get -y update && sudo apt-get -y install gcc clang libclang-dev libgssapi-krb5-2 libkrb5-dev libsasl2-modules-gssapi-mit musl-tools gcc-mingw-w64-x86-64
以下是使用 cargo 命令编译 "release" 和 "debug" 版本的方法。
git clone https://github.com/OPENCYBER-FR/RustHound
cd RustHound
cargo build --release
# or debug version
cargo b
结果可以在 target/release 或 target/debug 文件夹中找到。
以下为Linux操作系统中各个操作系统的编译方法。如果您需要其他编译系统,请参阅此链接中的列表:[https://doc.rust-lang.net.cn/nightly/rustc/platform-support.html](https://doc.rust-lang.net.cn/nightly/rustc/platform-support.html)
Linux x86_64静态版本的手动编译
# Install rustup and Cargo for Linux
curl https://sh.rustup.rs -sSf | sh

# Add Linux deps
rustup install stable-x86_64-unknown-linux-gnu
rustup target add x86_64-unknown-linux-gnu

# Static compilation for Linux
git clone https://github.com/OPENCYBER-FR/RustHound
cd RustHound
CFLAGS="-lrt";LDFLAGS="-lrt";RUSTFLAGS='-C target-feature=+crt-static';cargo build --release --target x86_64-unknown-linux-gnu
结果可在target/x86_64-unknown-linux-gnu/release文件夹中找到。
从Linux手动编译Windows静态版本
# Install rustup and Cargo in Linux
curl https://sh.rustup.rs -sSf | sh

# Add Windows deps
rustup install stable-x86_64-pc-windows-gnu
rustup target add x86_64-pc-windows-gnu

# Static compilation for Windows
git clone https://github.com/OPENCYBER-FR/RustHound
cd RustHound
RUSTFLAGS="-C target-feature=+crt-static" cargo build --release --target x86_64-pc-windows-gnu
结果可在target/x86_64-pc-windows-gnu/release文件夹中找到。
从Linux手动编译macOS静态版本
出色的文档:[https://wapl.es/rust/2019/02/17/rust-cross-compile-linux-to-macos.html](https://wapl.es/rust/2019/02/17/rust-cross-compile-linux-to-macos.html)
# Install rustup and Cargo in Linux
curl https://sh.rustup.rs -sSf | sh

# Add macOS tool chain
sudo git clone https://github.com/tpoechtrager/osxcross /usr/local/bin/osxcross
sudo wget -P /usr/local/bin/osxcross/ -nc https://s3.dockerproject.org/darwin/v2/MacOSX10.10.sdk.tar.xz && sudo mv /usr/local/bin/osxcross/MacOSX10.10.sdk.tar.xz /usr/local/bin/osxcross/tarballs/
sudo UNATTENDED=yes OSX_VERSION_MIN=10.7 /usr/local/bin/osxcross/build.sh
sudo chmod 775 /usr/local/bin/osxcross/ -R
export PATH="/usr/local/bin/osxcross/target/bin:$PATH"

# Cargo needs to be told to use the correct linker for the x86_64-apple-darwin target, so add the following to your project’s .cargo/config file:
grep 'target.x86_64-apple-darwin' ~/.cargo/config || echo "[target.x86_64-apple-darwin]" >> ~/.cargo/config
grep 'linker = "x86_64-apple-darwin14-clang"' ~/.cargo/config || echo 'linker = "x86_64-apple-darwin14-clang"' >> ~/.cargo/config
grep 'ar = "x86_64-apple-darwin14-clang"' ~/.cargo/config || echo 'ar = "x86_64-apple-darwin14-clang"' >> ~/.cargo/config

# Static compilation for macOS
git clone https://github.com/OPENCYBER-FR/RustHound
cd RustHound
RUSTFLAGS="-C target-feature=+crt-static" cargo build --release --target x86_64-apple-darwin --features nogssapi
结果可在target/x86_64-apple-darwin/release文件夹中找到。
优化二进制大小
💡 要获得RustHound的优化编译,请将以下编译参数添加到
Cargo.toml文件的末尾。
[profile.release]
opt-level = "z"
lto = true
strip = true
codegen-units = 1
panic = "abort"
二进制文件的大小将大幅减小。可以使用基本的cargo编译器命令。
make windows
更多信息[这里](https://github.com/johnthagen/min-sized-rust)
如何构建文档?
git clone https://github.com/OPENCYBER-FR/RustHound
cd RustHound
cargo doc --open --no-deps
用法
Usage: rusthound [OPTIONS] --domain <domain>

Options:
  -v...          Set the level of verbosity
  -h, --help     Print help information
  -V, --version  Print version information

REQUIRED VALUES:
  -d, --domain <domain>  Domain name like: DOMAIN.LOCAL

OPTIONAL VALUES:
  -u, --ldapusername <ldapusername>  LDAP username, like: user@domain.local
  -p, --ldappassword <ldappassword>  LDAP password
  -f, --ldapfqdn <ldapfqdn>          Domain Controler FQDN like: DC01.DOMAIN.LOCAL or just DC01
  -i, --ldapip <ldapip>              Domain Controller IP address like: 192.168.1.10
  -P, --ldapport <ldapport>          LDAP port [default: 389]
  -n, --name-server <name-server>    Alternative IP address name server to use for DNS queries
  -o, --output <output>              Output directory where you would like to save JSON files [default: ./]

OPTIONAL FLAGS:
      --ldaps           Force LDAPS using for request like: ldaps://DOMAIN.LOCAL/
      --dns-tcp         Use TCP instead of UDP for DNS queries
      --dc-only         Collects data only from the domain controller. Will not try to retrieve CA security/configuration or check for Web Enrollment
      --old-bloodhound  For ADCS only. Output result as BloodHound data for the original BloodHound version from @BloodHoundAD without PKI support
  -z, --zip             Compress the JSON files into a zip archive

OPTIONAL MODULES:
      --fqdn-resolver  Use fqdn-resolver module to get computers IP address
      --adcs           Use ADCS module to enumerate Certificate Templates, Certificate Authorities and other configurations.
                       (For the custom-built BloodHound version from @ly4k with PKI support)
演示
简单用法
# Linux with username:password
rusthound -d north.sevenkingdoms.local -u 'jeor.mormont@north.sevenkingdoms.local' -p '_L0ngCl@w_' -o /tmp/demo -z

# Linux with username:password and ldapip
rusthound -d north.sevenkingdoms.local -i 192.168.56.11 -u 'jeor.mormont@north.sevenkingdoms.local' -p '_L0ngCl@w_' -o /tmp/demo -z

# Linux with username:password and ldaps
rusthound -d north.sevenkingdoms.local --ldaps -u 'jeor.mormont@north.sevenkingdoms.local' -p '_L0ngCl@w_' -o /tmp/demo -z
# Linux with username:password and ldaps and custom port
rusthound -d north.sevenkingdoms.local --ldaps -P 3636 -u 'jeor.mormont@north.sevenkingdoms.local' -p '_L0ngCl@w_' -o /tmp/demo -z

# Tips to redirect and append both standard output and standard error to a file > /tmp/rh_output 2>&1
rusthound -d north.sevenkingdoms.local --ldaps -u 'jeor.mormont@north.sevenkingdoms.local' -p '_L0ngCl@w_' -o /tmp/demo --fqdn-resolver > /tmp/rh_output 2>&1

# Windows with GSSAPI session
rusthound.exe -d sevenkingdoms.local --ldapfqdn kingslanding
# Windows simple bind connection username:password (do not use single or double quotes with cmd.exe)
rusthound.exe -d sevenkingdoms.local -u jeor.mormont@north.sevenkingdoms.local -p _L0ngCl@w_ -o output -z

# Kerberos authentication (Linux)
export KRB5CCNAME="/tmp/jeor.mormont.ccache"
rusthound -d sevenkingdoms.local -f kingslanding -k -z
# Kerberos authentication (Windows)
rusthound.exe -d sevenkingdoms.local -f kingslanding -k -z

模块 FQDN 解析器
# Linux with username:password and FQDN resolver module
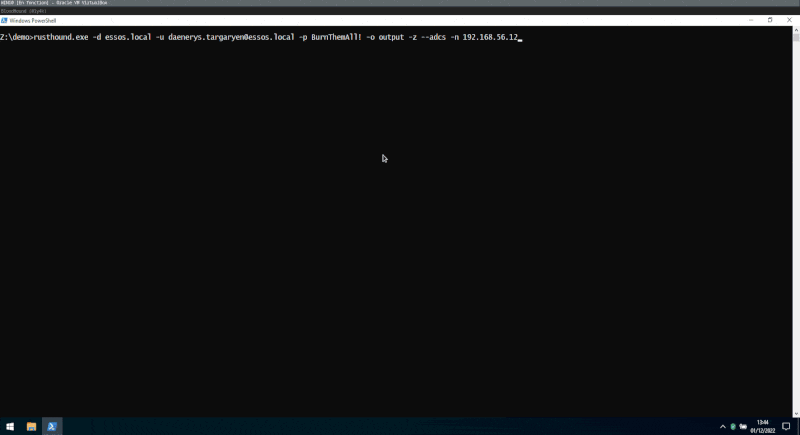
rusthound -d essos.local -u 'daenerys.targaryen@essos.local' -p 'BurnThemAll!' -o /tmp/demo --fqdn-resolver -z
# Linux with username:password and ldaps and FQDN resolver module and TCP DNS request and custom name server
rusthound -d essos.local --ldaps -u 'daenerys.targaryen@essos.local' -p 'BurnThemAll!' -o /tmp/demo --fqdn-resolver --tcp-dns --name-server 192.168.56.12 -z
# Windows with GSSAPI session and FQDN resolver module
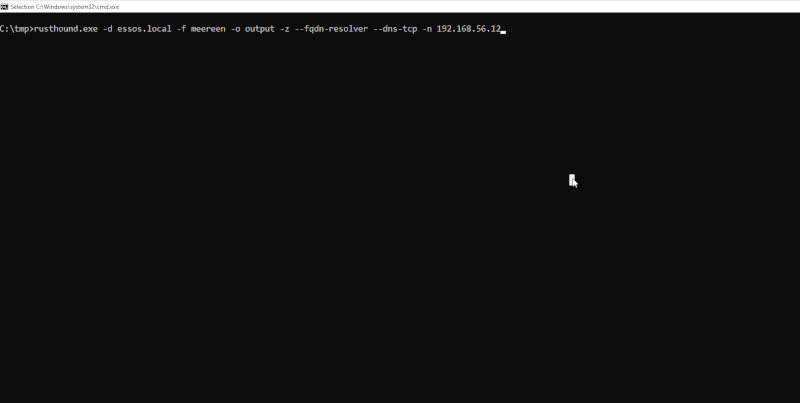
rusthound.exe -d essos.local -f meereen -o output --fqdn-resolver -z
# Windows simple bind connection username:password and FQDN resolver module and TCP DNS request and custom name server (do not use single or double quotes with cmd.exe)
rusthound.exe -d essos.local -u daenerys.targaryen@essos.local -p BurnThemAll! -o output -z --fqdn-resolver --tcp-dns --name-server 192.168.56.12
模块 ADCS 收集器
使用@ly4k BloodHound版本的示例。
# Linux with username:password and ADCS module for @ly4k BloodHound version
rusthound -d essos.local -u 'daenerys.targaryen@essos.local' -p 'BurnThemAll!' -o /tmp/adcs --adcs -z
# Linux with username:password and ADCS module and dconly flag (will don't check webenrollment)
rusthound -d essos.local -u 'daenerys.targaryen@essos.local' -p 'BurnThemAll!' -o /tmp/adcs --adcs --dc-only -z

# Linux with username:password and ADCS module using "--old-bloodhound" argument for official @BloodHoundAd version
rusthound -d essos.local -u 'daenerys.targaryen@essos.local' -p 'BurnThemAll!' -o /tmp/adcs --adcs --old-bloodhound -z

# Windows with GSSAPI session and ADCS module
rusthound.exe -d essos.local -f meereen -o output -z --adcs
# Windows with GSSAPI session and ADCS module and TCP DNS request and custom name server
rusthound.exe -d essos.local --ldapfqdn meereen -o output -z --adcs --tcp-dns --name-server 192.168.56.12
# Windows simple bind connection username:password (do not use single or double quotes with cmd.exe)
rusthound.exe -d essos.local -u daenerys.targaryen@essos.local -p BurnThemAll! -o output -z --adcs --dc-only
您可以在资源文件夹中找到演示中使用的自定义查询。
使用以下命令安装它
cp resources/customqueries.json ~/.config/bloodhound/customqueries.json
🚀 统计
为了对一个具有更多LDAP对象的DC进行统计分析,请在GOAD中运行BadBlood于域控制器ESSOS.local。现在DC应有约3500个对象。以下是运行以下工具的平均时间。
| 工具 | 环境 | 对象 | 时间 | 命令 |
|---|---|---|---|---|
| SharpHound.exe | Windows |
~3500 | ~51.605秒 | Measure-Command { sharphound.exe -d essos.local --ldapusername 'khal.drogo' --ldappassword 'horse' --domaincontroller '192.168.56.12' -c All } |
| BloodHound.py | Linux |
~3500 | ~9.657秒 | time python3 bloodhound.py -u khal.drogo -p horse -d essos.local -ns 192.168.56.12 --zip -c all |
| RustHound.exe | Windows |
~3500 | ~5.315秒 | Measure-Command { rusthound.exe -d essos.local -u khal.drogo@essos.local -p horse -z } |
| RustHound | Linux |
~3500 | ~3.166秒 | time rusthound -d essos.local -u khal.drogo@essos.local -p horse -z |
🚥 路线图
身份验证
- LDAP (389)
- LDAPS (636)
-
BIND -
NTLM -
Kerberos - 提示输入密码
输出
- users.json
- groups.json
- computers.json
- ous.json
- gpos.json
- containers.json
- domains.json
- cas.json
- templates.json
- args and function to zip JSON files --zip
模块
- 如果您的用户可以读取它们,则检索LAPS密码 自动
- 将找到的全局唯一标识符计算机解析到IP地址 --fqdn-resolver
- 使用Certipy检索用于ESC利用的证书 --adcs
- Kerberos攻击模块(ASREPROASTING和KERBEROASTING) --attack-kerberos
- 从受信任域检索数据 --follow-trust(目前正在开发此模块,已有此模块的测试版)
BloodHound v4.2
-
解析功能
- 用户与计算机
-
HasSIDHistory
-
- 用户
-
属性:sfupassword
-
- 用户与计算机
-
DCERPC(依赖关系)
- 计算机
-
会话
-
- 组织单元和域
-
本地管理员 -
远程桌面用户 -
Dcom用户 -
PSRemote用户
-
- CA证书
-
用户指定SAN -
请求处理
-
- 计算机
🔗 链接
- 博客文章: https://www.opencyber.com/rusthound-data-collector-for-bloodhound-written-in-rust/
- BloodHound.py: https://github.com/fox-it/BloodHound.py
- SharpHound: https://github.com/BloodHoundAD/SharpHound
- BloodHound: https://github.com/BloodHoundAD/BloodHound
- BloodHound 文档: https://bloodhound.readthedocs.io/en/latest/index.html
- GOAD: https://github.com/Orange-Cyberdefense/GOAD
- ly4k BloodHound 版本: https://github.com/ly4k/BloodHound
- Certipy: https://github.com/ly4k/Certipy
依赖项
~26–62MB
~1M SLoC