21 个稳定版本
| 4.0.0 | 2024年5月29日 |
|---|---|
| 3.2.4 | 2024年3月15日 |
| 3.2.2 | 2024年1月8日 |
| 3.0.13 | 2023年10月18日 |
| 3.0.11 | 2023年4月14日 |
在 图像 中排名第 28
每月下载 232 次
4.5MB
1.5K SLoC
folderify
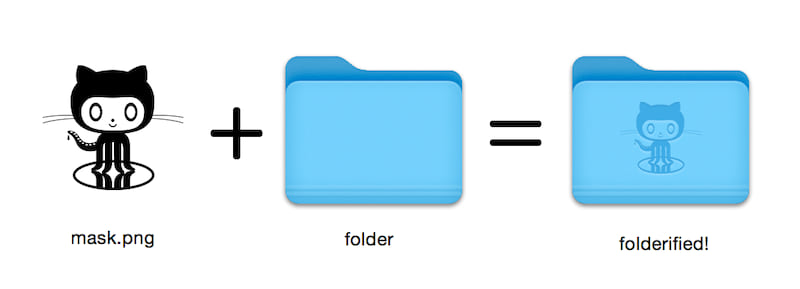
在原生风格中生成像素完美的 macOS 文件夹图标。
- 自动包含从
16x16到512x512@2x的所有图标尺寸。 - 浅色或深色模式(默认自动选择)。
正在使用 folderify 吗? 告诉我 或 告诉我,我很乐意展示一些实际应用案例!
安装
使用 Homebrew 安装 folderify
brew install folderify
推荐使用 Homebrew 安装,并自动安装您的 shell 的 folderify 参数补全。
以下为其他安装选项。
用法
使用遮罩为文件夹分配图标
folderify mask.png /path/to/folder
生成 mask.icns 和 mask.iconset 文件
folderify mask.png
默认情况下,folderify 使用您系统的当前浅色/深色模式。使用 --color-scheme 来覆盖此设置
folderify --color-scheme dark mask.png
注意
- 目前尚无简单的方法在切换整个操作系统时自动在浅色和深色模式之间切换图标。您只能为文件夹分配一个版本的图标。
提示
为了获得最佳效果
- 使用
.png遮罩。 - 在透明背景上使用纯黑色设计。
- 确保遮罩图像的角落像素是透明的。它们用于空白边距。
- 传递
--no-trim标志并使用一个遮罩- 高度为 384px,
- 宽度为 128px 的倍数(最多 768px),
- 使用 16px 的网格。
- 每个 64x64 块将精确地与最小图标大小下的 1 个像素对齐。
OS X (macOS 10)
自 v3 版本起,folderify 不再支持 OS X / macOS 10 的文件夹样式
- Leopard 风格(OS X 10.5 至 OS X 10.9)
- Yosemite 风格(OS X 10.10 至 macOS 10.15)
要生成这些,请使用 folderify v2。例如
pip3 install folderify
python3 -m folderify --macOS 10.5 path/to/icon.png
其他安装选项
如果您没有 Homebrew 但您的系统上已经安装了 ImageMagick(magick 二进制文件),您可以使用以下命令
使用 Rust 安装
cargo install folderify
从源代码安装
或直接下载代码
git clone https://github.com/lgarron/folderify && cd folderify

# Run directly
cargo run -- --reveal examples/src/folder_outline.png .

# Install (assuming the `cargo` bin is in your path)
cargo install --path .
folderify --reveal examples/src/folder_outline.png .
现在仓库文件夹应该有一个自定义图标。
for file in examples/src/*.png; do cargo run -- $file; done
open examples/src/
您应该看到许多新的 .iconset 文件夹和 .icns 文件,这些是从 .png 遮罩自动生成的。
依赖项
- ImageMagick - 用于图像处理(您应该在命令行上能够运行
magick和identify)。 - 包含在 macOS 中
iconutil
- 可选
fileiconsips,DeRez,Rez,SetFile(对于其中的一些,您需要 Xcode 命令行工具。)
完整选项
Generate a native-style macOS folder icon from a mask file.

Usage: folderify [OPTIONS] [MASK] [TARGET]

Arguments:
  [MASK]
          Mask image file. For best results:
          - Use a .png mask.
          - Use a solid black design over a transparent background.
          - Make sure the corner pixels of the mask image are transparent. They are used for empty margins.
          - Make sure the non-transparent pixels span a height of 384px, using a 16px grid.
          If the height is 384px and the width is a multiple of 128px, each 64x64 tile will exactly align with 1 pixel at the smallest folder size.

  [TARGET]
          Target file or folder. If a target is specified, the resulting icon will
          be applied to the target file/folder. Else (unless --output-icns or
          --output-iconset is specified), a .iconset folder and .icns file will be
          created in the same folder as the mask (you can use "Get Info" in Finder
          to copy the icon from the .icns file).

Options:
      --output-icns <ICNS_FILE>
          Write the `.icns` file to the given path.
          (Will be written even if a target is also specified.)

      --output-iconset <ICONSET_FOLDER>
          Write the `.iconset` folder to the given path.
          (Will be written even if a target is also specified.)

  -r, --reveal
          Reveal either the target, `.icns`, or `.iconset` (in that order of preference) in Finder

      --macOS <MACOS_VERSION>
          Version of the macOS folder icon, e.g. "14.2.1". Defaults to the version currently running

      --color-scheme <COLOR_SCHEME>
          Color scheme — auto matches the current system value

          [default: auto]
          [possible values: auto, light, dark]

      --no-trim
          Don't trim margins from the mask.
          By default, transparent margins are trimmed from all 4 sides.

      --no-progress
          Don't show progress bars

      --badge <BADGE>
          Add a badge to the icon. Currently only supports one badge at a time

          [possible values: alias, locked]

  -v, --verbose
          Detailed output. Also sets `--no-progress`

      --completions <SHELL>
          Print completions for the given shell (instead of generating any icons).
          These can be loaded/stored permanently (e.g. when using Homebrew), but they can also be sourced directly, e.g.:

           folderify --completions fish | source # fish
           source <(folderify --completions zsh) # zsh

          [possible values: bash, elvish, fish, powershell, zsh]

  -h, --help
          Print help (see a summary with '-h')

  -V, --version
          Print version
示例
从 Apple 标志生成的示例: 
依赖项
~3–10MB
~98K SLoC